Page History
...
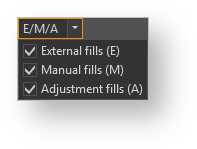
Fig. 1 – Fill manager form
Filtering fills
In order to filter fills by instrument, select desired futures or options in the left-hand instrument tree and click to move selected items into the right-hand tree. Items in the right tree are filter conditions - only fills on instruments from the right tree will be shown. Note that items in the right tree that represent futures have checkboxes - if the checkbox is set then the future is included in the filter, otherwise it will be excluded. You may remove items from the right tree by selecting them and clicking
to remove them or click
to remove all items from the right tree.
...
Click in the fill's row to delete it from the database. You can only delete virtual fills; real fills cannot be deleted. When you delete a virtual fill, its effect on the position is reverted (you can read more about virtual fills and their effect on positions here).
Fills table
The fills table is displayed on the right half of the fill manager's window and contains the following columns:
- Exchange ID – fill's identification code assigned by the data source;
- Account – name of the account which the fill belongs to;
- Strategy – name of the strategy which the fill belongs to;
- Base asset – ticker symbol of the fill's instrument's base asset or commodity;
- Instrument – ticker symbol of the fill's instrument;
- Type – fill's instrument type: Call means call option, Put means put option, Fut means future contract;
- Strike – fill's instrument strike price. Displayed only for options;
- Time – fill's date and time;
- Price – fill's price;
- Quantity – fill's size. Sizes greater than zero indicate buy fills, sizes less than zero indicate sell fills;
- Virtual – contains Yes if the fill is virtual, contains No otherwise;
- Del – if the fill is virtual, then this column will contain a Delete button; it will be empty otherwise.
You may configure which columns will be visible by clicking . The following dialog will open (Fig. 5).
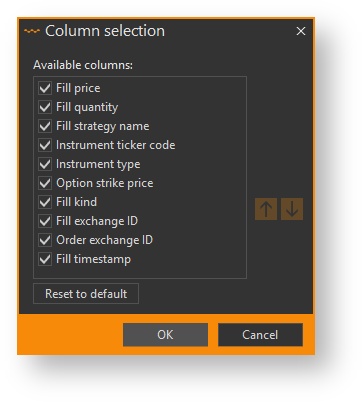
Fig. 5 – columns selection
Use the checkboxes to specify which columns you wish to see on the option desk, then click the OK button to apply changes.
Columns can be also reordered. Press the left mouse button on the column and drag it while holding the left mouse button down. Release the mouse button to drop the column in its new place.
Column settings will be saved so they will be applied automatically when the upcoming Option Workshop launches. If you want to return to default settings, click .
Overview
Content Tools