Page History
To create and provide reports on the performed transactions to the repository in the test environment you need to add test certificates and keys to the Certificates storage. When a client has provided all necessary information (see Obtaining access to the Web-client), test keys in archive will be sent to him by e-mail. The archive contains (Fig. 1):
...
| Info |
|---|
If the user works with several profiles, you need to add another profile. You can find a detailed information in the Profile settings. |
If If there are several profiles, the profile selection dialog will pop up when starting a Certificates storage, where you will need to select the new profile and click the OK button (Fig. 2).
| Note |
|---|
The software interface is not localized yet, so please, use the following set of screenshots. |
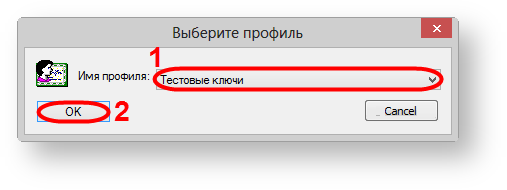
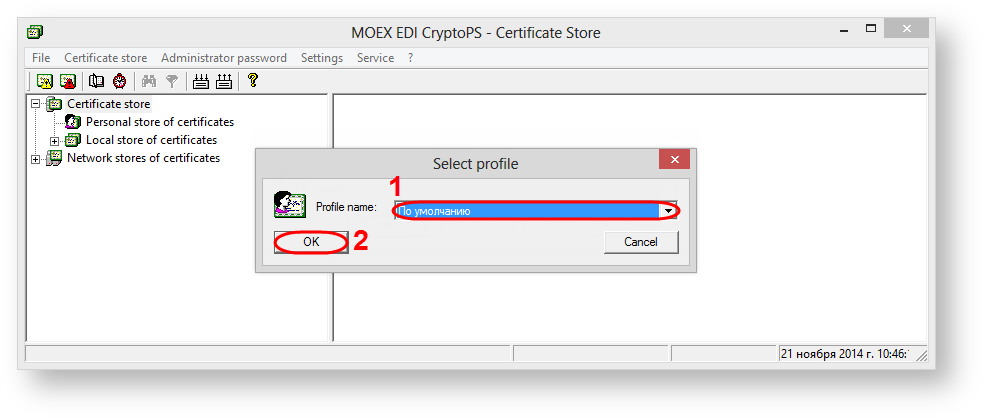
Figure 2 – profile selection
Next, you need to go to the directory containing сertificates to create a personal and local storage (profile) (Fig. 3).
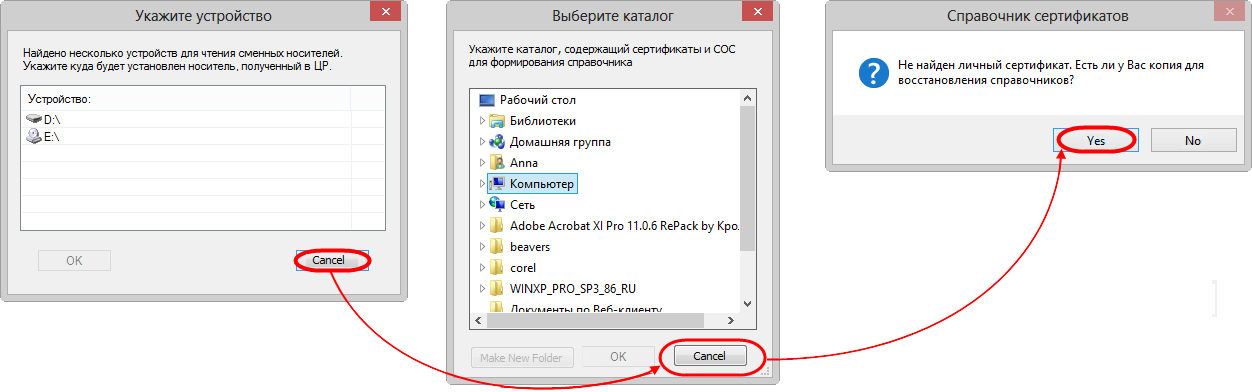
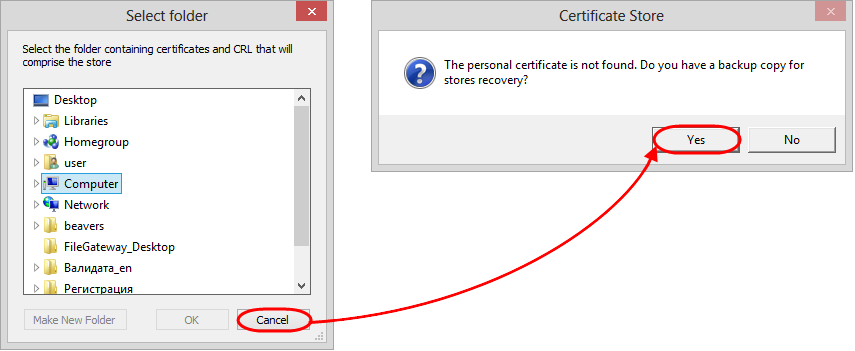
Figure 3 – directory selection
As a result, the dialog will pop up, where you will need to choose the Spr folder and click the OK button (Fig. 4).
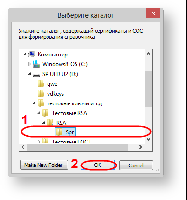
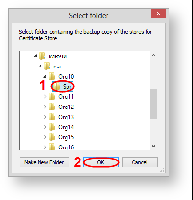
Figure 4 – Spr folder
Next, you need to close the Certificates storage to apply settings (Fig. 5). When
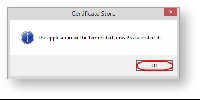
Figure 5 – exit the Certificates storage
If you are not using the latest storage when running Certificates storage using the the Start menu→All Programs→ ПКЗИ СЭД МБ (MOEX EDS DSSK)→Справочник сертификатов (Certificates storage), a message will appear informing that the personal storage is protected with the test certificate. You need to click the OK button in this window window (Fig. 6).
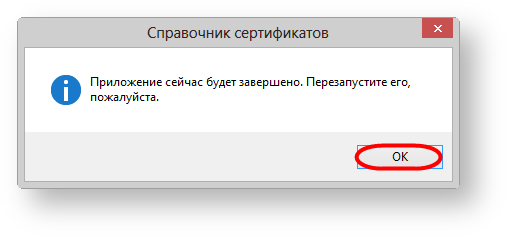
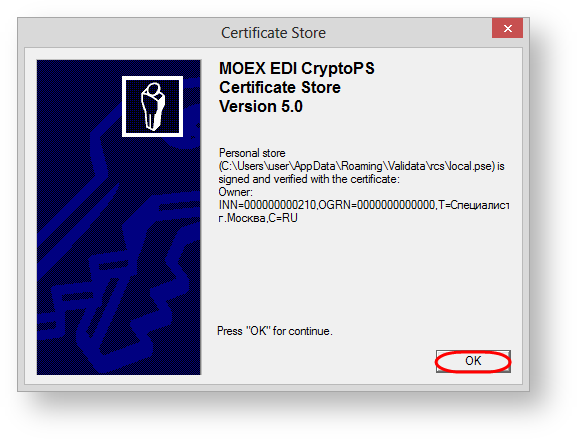
Figure 5 – exit the Certificates storage Figure 6 – informational message
Figure 6 – informational message
If you are using the latest storage when running Certificates storage using the Start menu→All Programs→ ПКЗИ СЭД МБ (MOEX EDS DSSK)→Справочник сертификатов (Certificates storage), a message will appear, where you need to click Yes (Fig. 7).
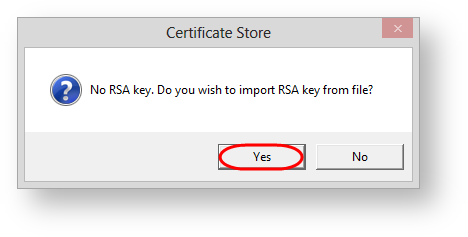
Figure 7 – informational message
As a result, the dialog will pop up, where you will need to choose test private key and click the Open button (Fig. 8).
| Info |
|---|
The file name of the test key is formed by mask Organization [the test private key number].rsa |
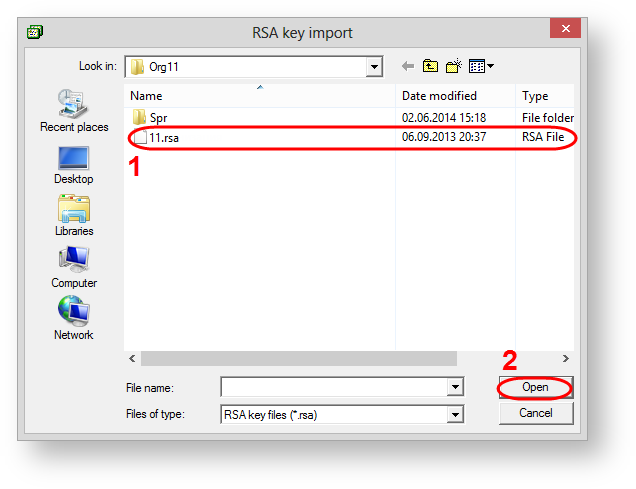
Figure 8 – test private key
Then the certificate must be set as default. To do this, select the added certificate, right-click on the shortcut menu, and select Make the certificate as working (Fig. 9).
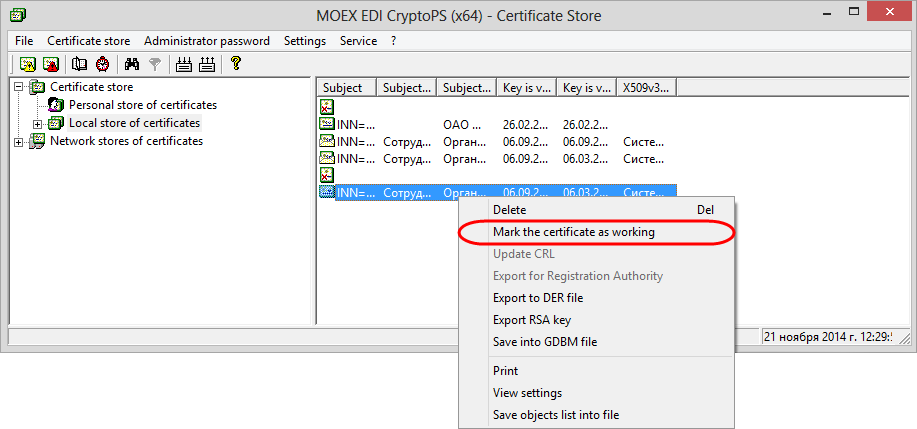
Fig. 9 – selecting the working certificate
After adding a personal certificate to the Certificates storage, the personal storage is signed on the personal test certificate. The generation of a digital signature for sent messages is ensured by the private test key.
To ensure information security in the Web-client when sending messages the system encrypts data using the NSD EDI certificates. The NSD certificate must be added in the Certificates storage (see Adding the NSD certificate).
| Note |
|---|
The information for further preparation of the computer and the configuration of the installed components is presented in the following articles: How to obtainthe .cer file; |
Overview
Content Tools