Page History
...
- Draft name – message name assigned at creation and saving;
- Form – message form code;
- Last changed – date and time of last message modification;
- Last changed by – name of the user who made changes;
- Last revision – latest version of the document;
- Status – status of the document (Draft, Deleted, ToBeSend, HasBeenSent, Imported, Template, Sending).
If the file is attached to the draft, the icon will be displayed (Fig. 2).

Fig. 2 – attached file
Filtering
The draft table can be filtered by date to display the messages created or modified within a certain period of time. :
- instrument;
- status;
- date;
- user, who modified the draft;
- string – search by the comment, correlation id and the transaction number.
Clicking on button  opens a bar for specifying a date range using a calendar (Fig. 3)opens a block of filters settings. After the time has been specified, click the button
 ![]() to apply filtering. This will generate a table with drafts corresponding to the filter parameters (read more here).
to apply filtering. This will generate a table with drafts corresponding to the filter parameters (read more here).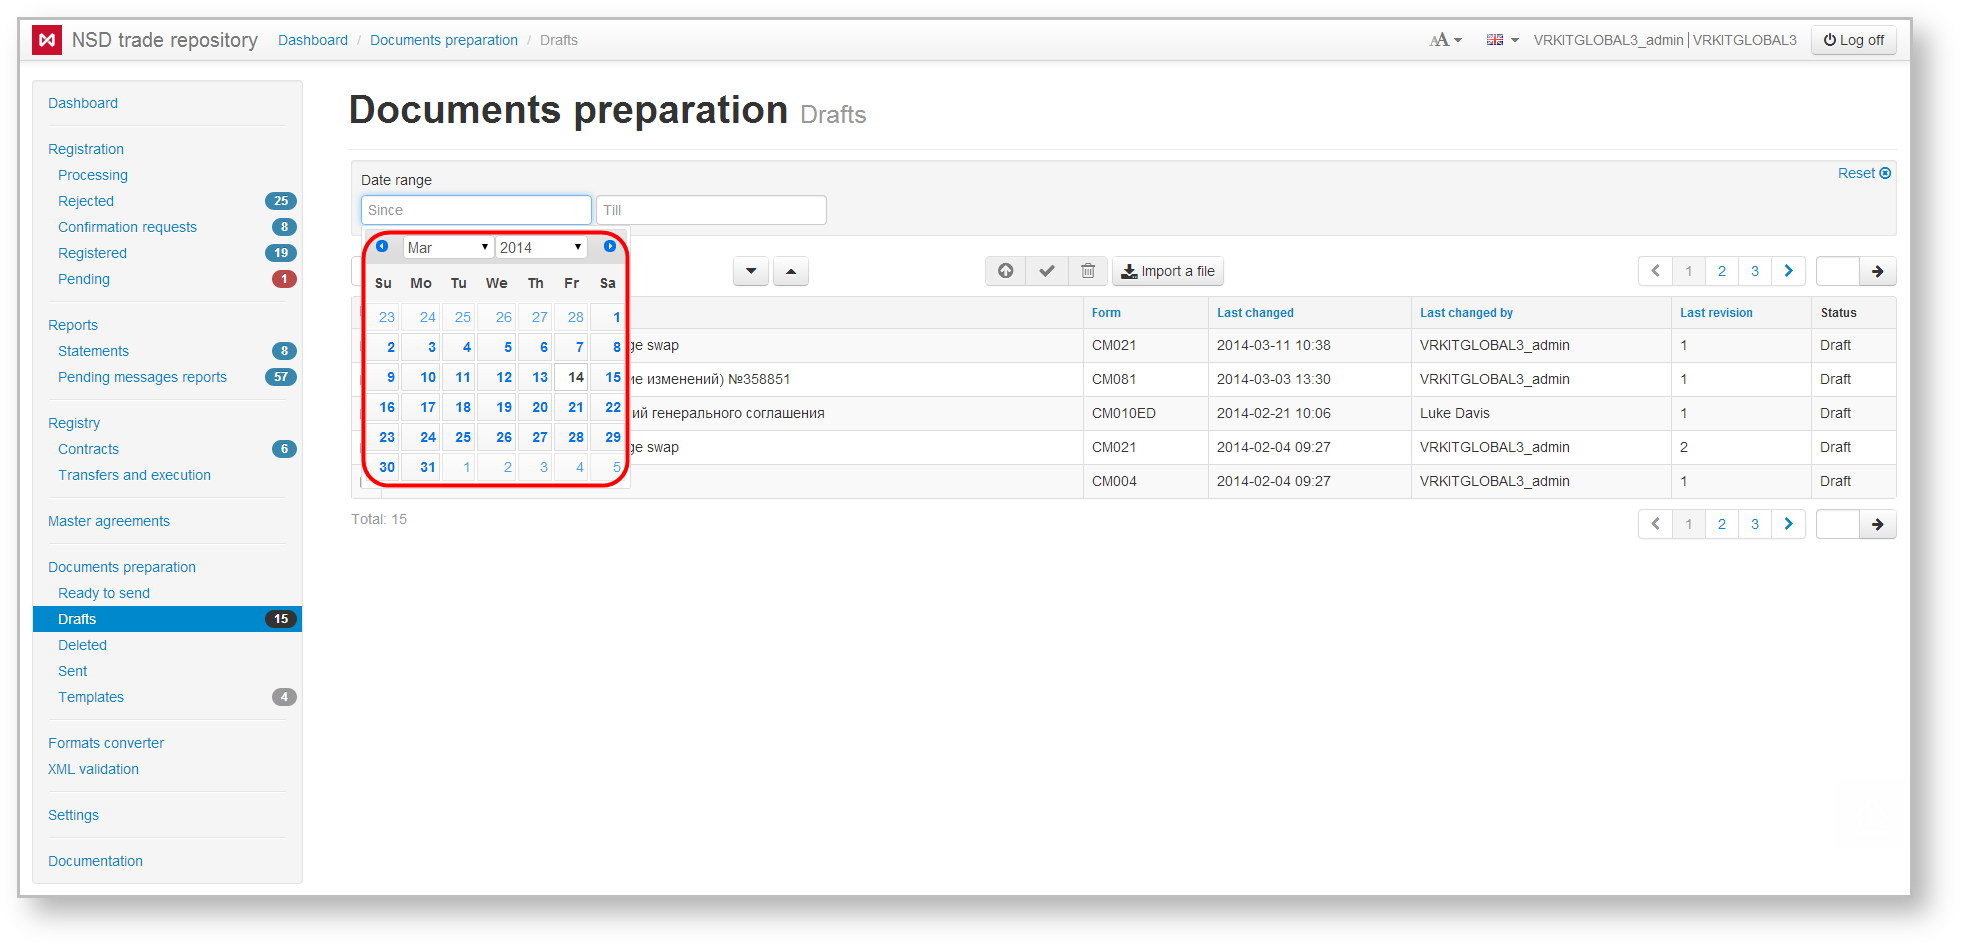
Fig. 3 – setting filters for the
Additional table
Clicking on the row (Fig. 43.1) opens an additional table (Fig. 43.2), which displays the history of document modifications:
- date of modification;
- version of the document and the name of the user who created the revision. The version number is automatically assigned to the document by the Web-client every time you save your changes.
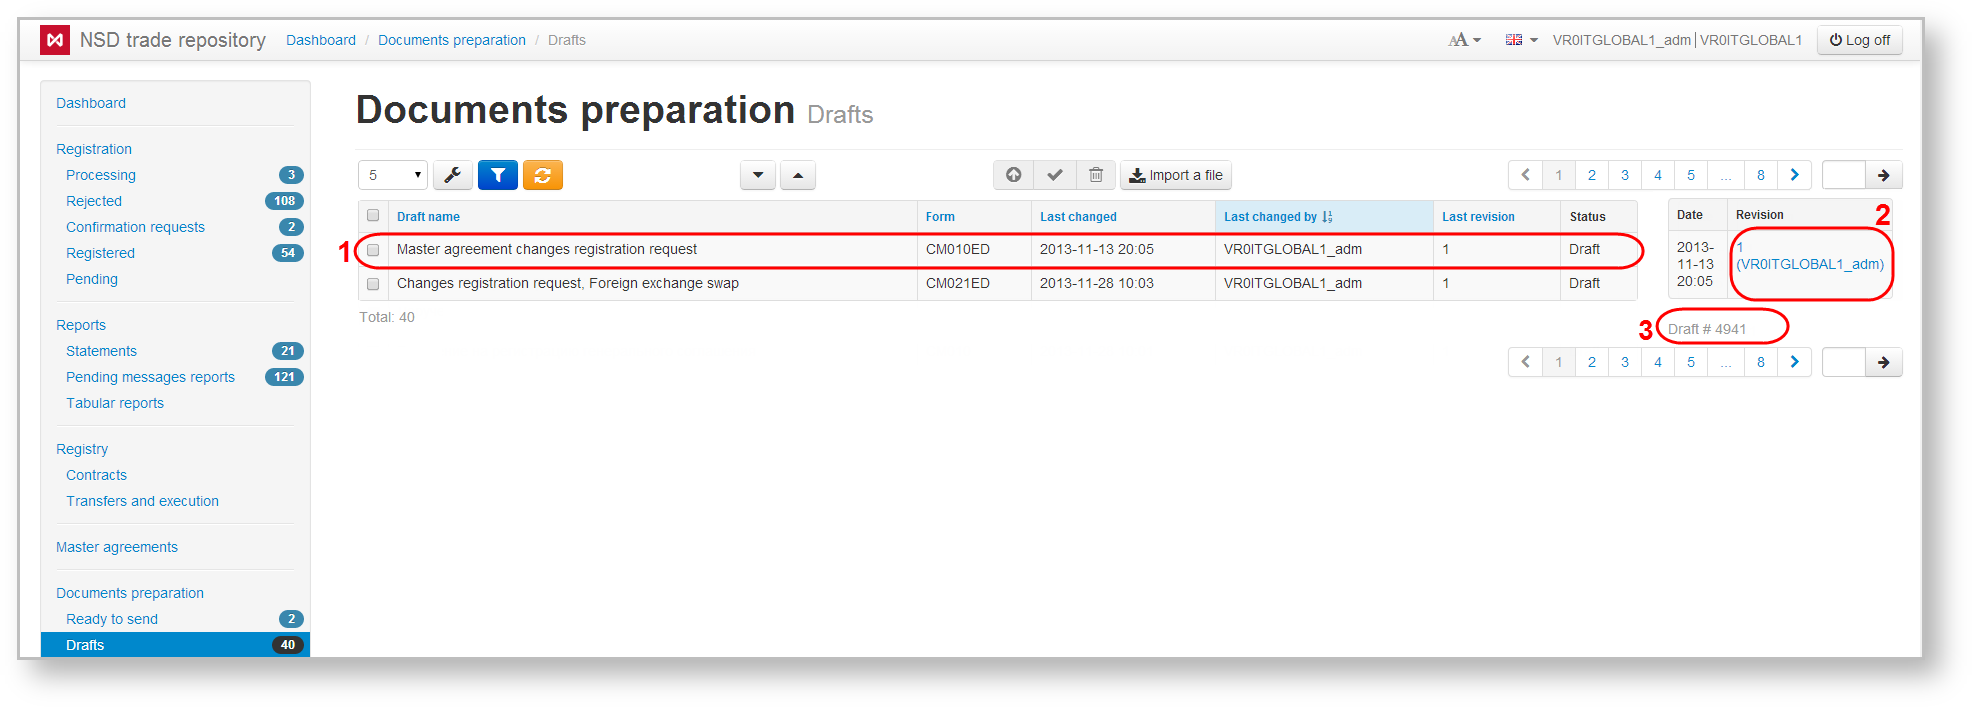
Fig. 4 3 – additional table
Under the table, the draft ID number is specified (Fig. 43.3), assigned by the system at message creation. The ID number is not changed.
To view any version of the draft click on its number. This will open a window to view message (Fig. 54).
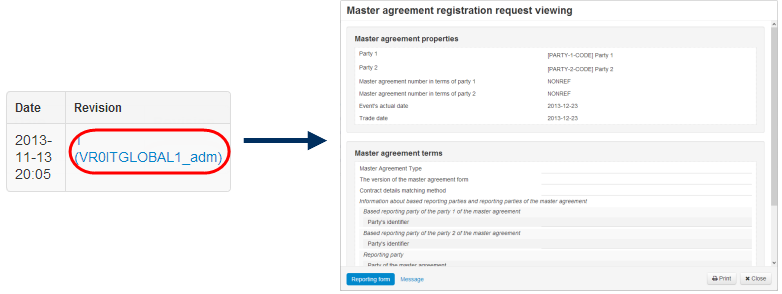
Fig. 5 4 – view draft
In the Draft form the document can be renamed, edited, a template can be created based on it, etc. All these actions are performed using the toolbar that appears when you hover the mouse over a row in the table. The toolbar is described in Table 1.
...
The selection of the orders is performed by checking the appropriate checkboxes in the first column of the table (Fig. 65,1). Then you need to click the button on the toolbar to perform an operation (Fig. 65,2).
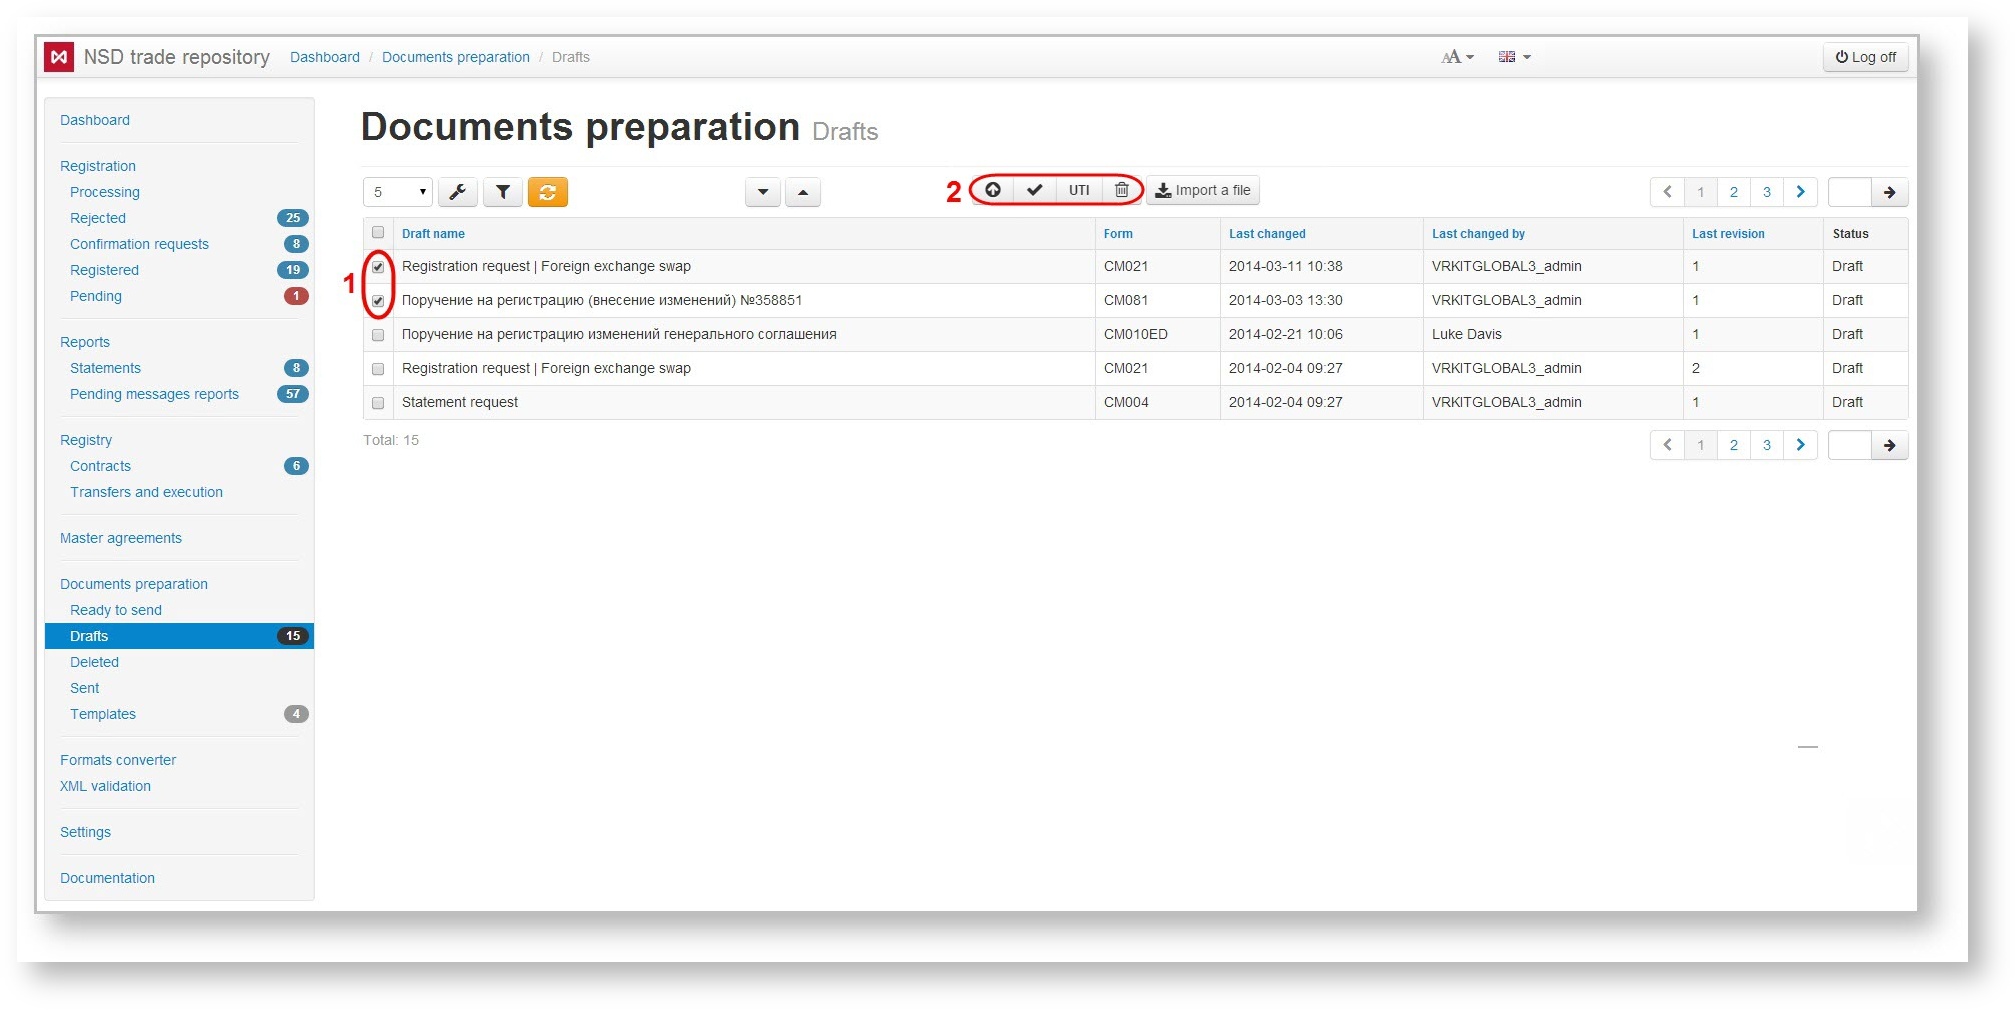
Fig. 6 5 – working with several orders
...
Overview
Content Tools