Page History
| Section | |||||||||||||||||||||||||||
|---|---|---|---|---|---|---|---|---|---|---|---|---|---|---|---|---|---|---|---|---|---|---|---|---|---|---|---|
|
| Note |
|---|
If the computer of the technical administrator has a x64 Windows OS, the 32-bit Certificates storage must be complemented with a 64-bit system. This is necessary to decrypt the login and password for entering the Web-client that are e-mailed in an encrypted file. Other system users (administrators and operators) do not need the installation of a 64-bit Certificates storage. |
...
Then the screen will display the Setup Wizard Welcome screen, where you should click Next (Fig. 2).
| Warning |
|---|
The software interface is not localized yet, so please, use the following set of screenshots. |
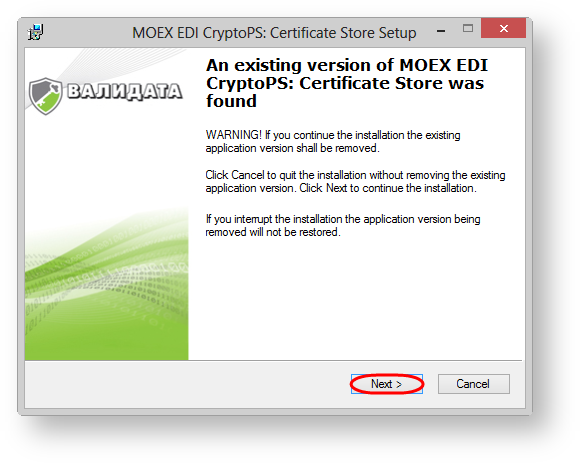
Fig. 2 – start of installation
...
Table 1 – Installation of the Certificates storage
| Dialog box | Action |
|---|---|
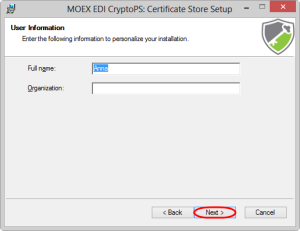 | In this window you will be prompted to enter full name and company name. We recommend skipping this step by clicking on the Next button |
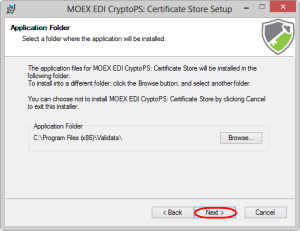 | In this window you will be asked to specify a destination folder (by default C:\ Program Files (x86)\ Validata\), using the Browse button. We recommend skipping this step by clicking on the Next button |
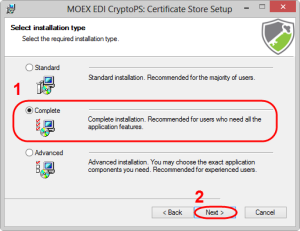 | In this window you can select Full installation (installing all components required for the Web-client to work) (clause 1) and click Next (clause 2) |
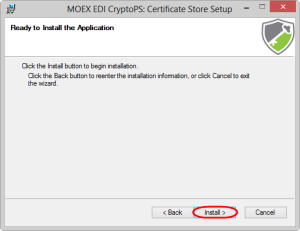 | In this window click Next to start installation |
Further progress of the installation is displayed in the dialog box System Update (Fig. 3).
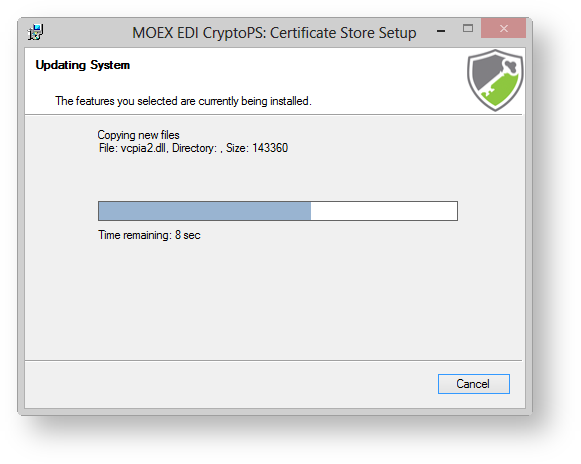
Fig. 3 – Status of the installation
After a few seconds the program will be installed on the computer and a dialog will pop up (Fig. 4), where you need to click Finish.
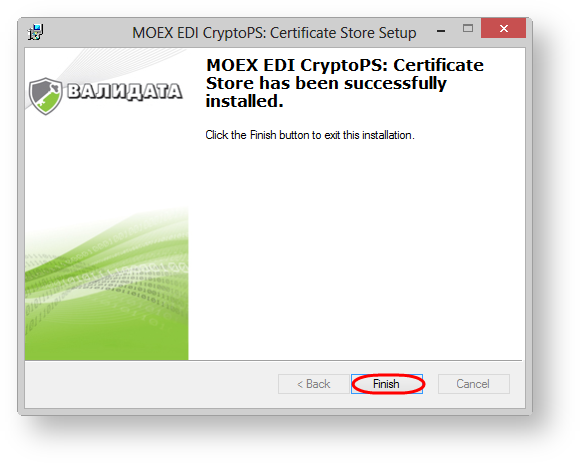
Figure 4 – installation complete
...
Overview
Content Tools