The Web-client uses a typed form for creating/editing messages, which has two display modes-full screen (Fig. 1) and modal window (Fig. 2).
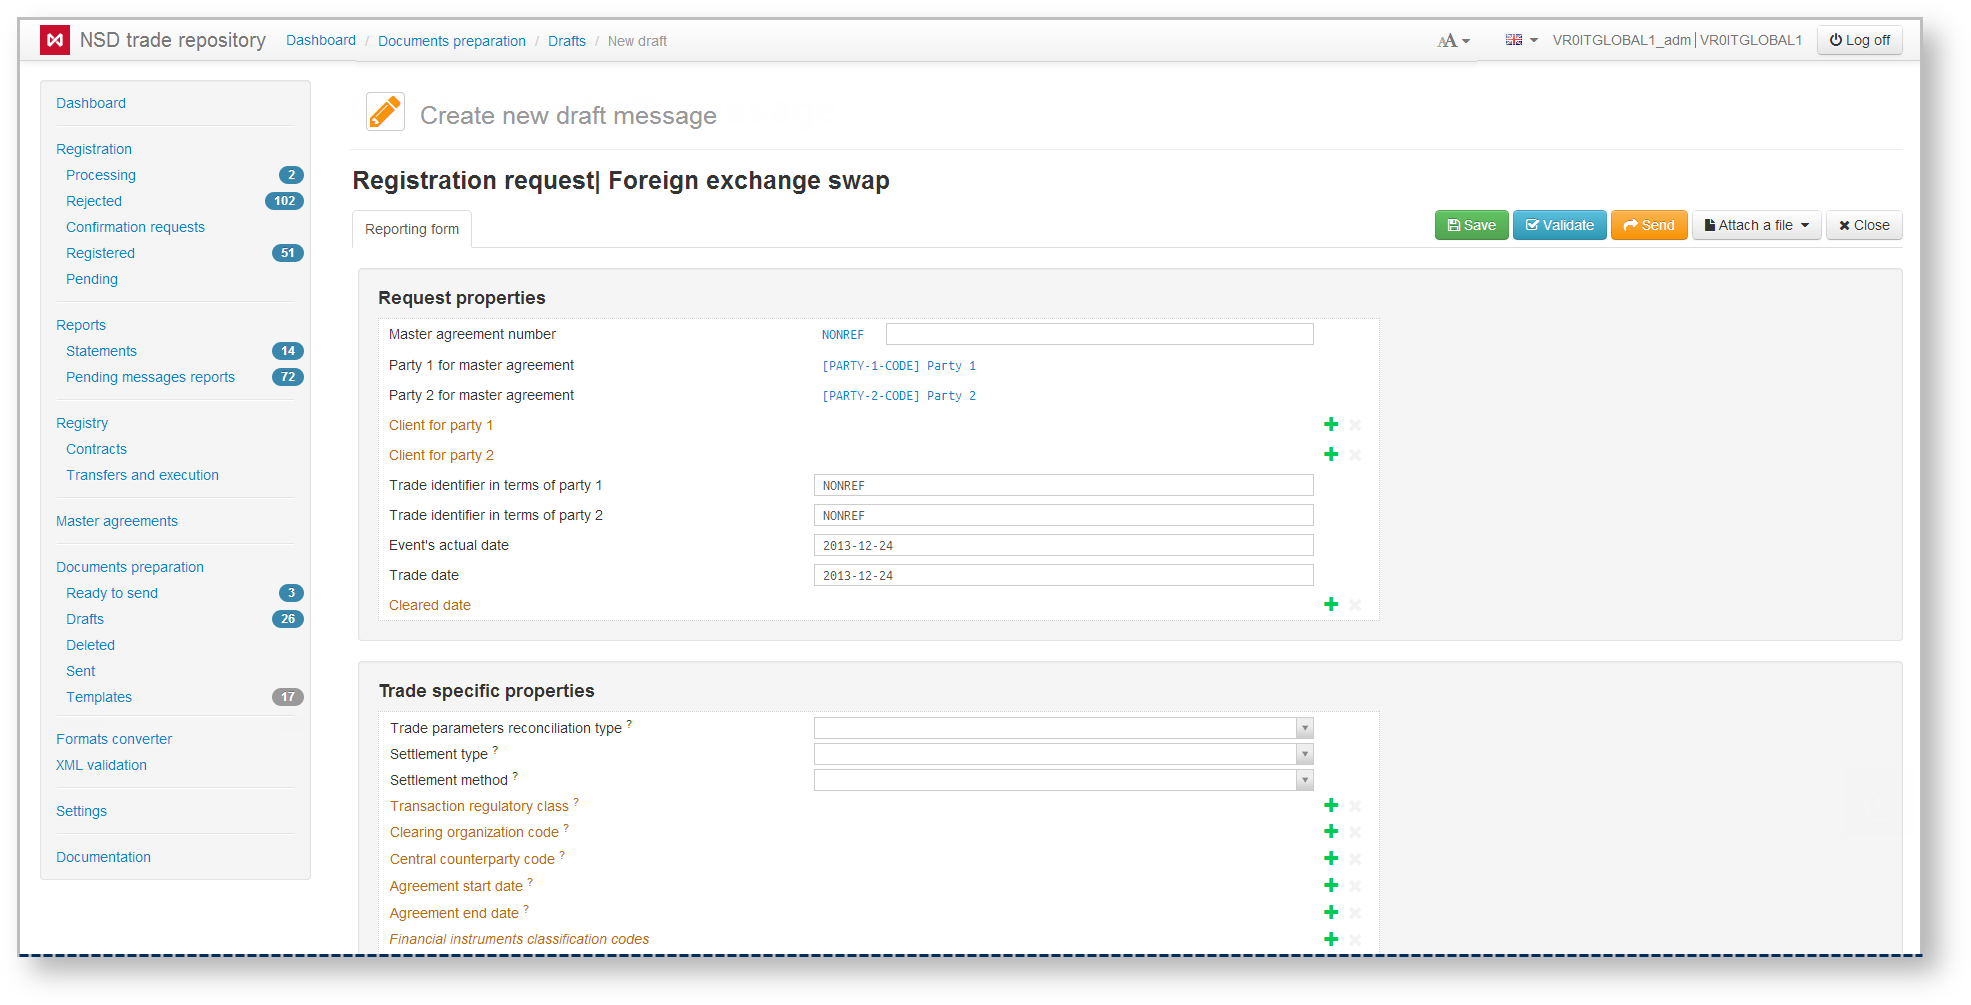
Fig. 1 – full screen mode
On this page:
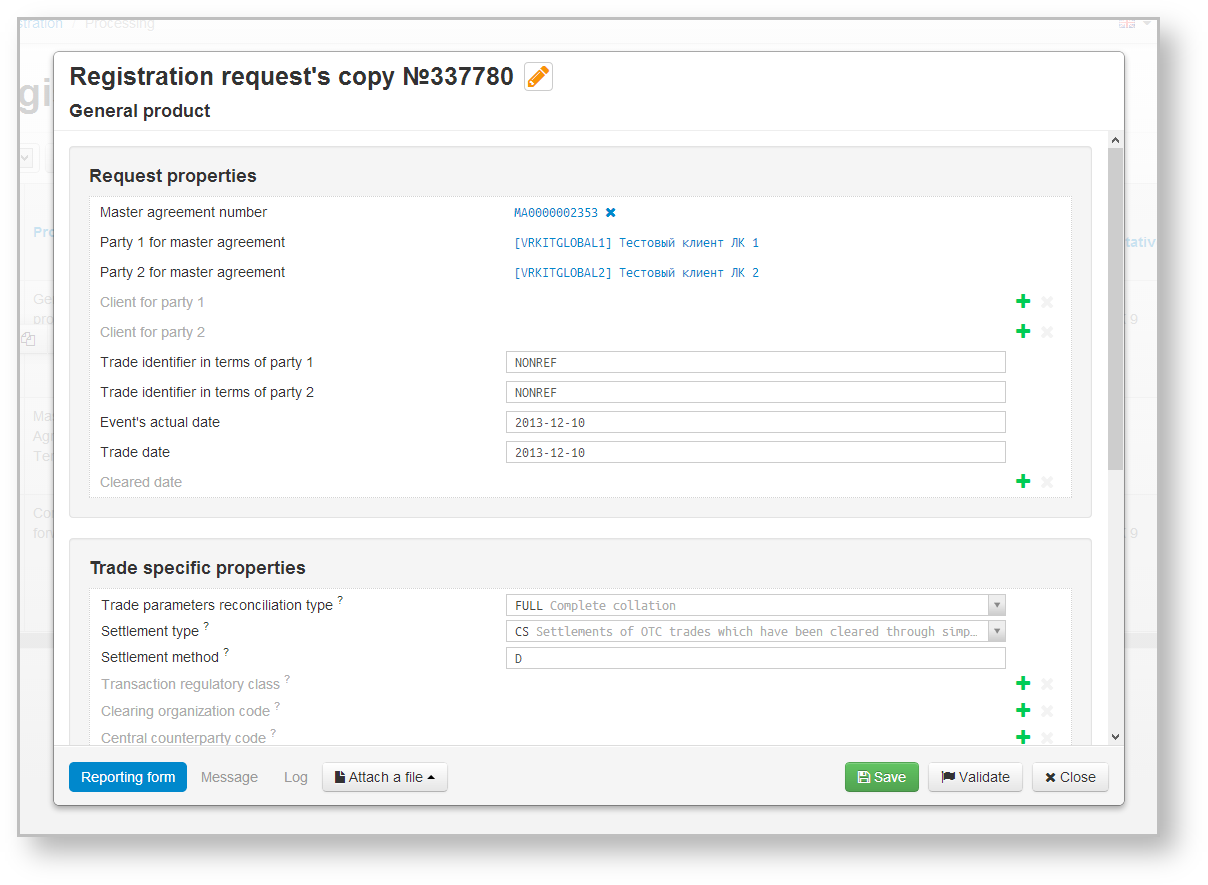
Fig. 2 – modal window form display
The full screen mode is used by default to create, copy and edit messages in the sub-sections of the Preparation section. The second display mode is available only for the administrator and used to view and modify messages sent to the repository, which are contained in the Registration, Reports, Registered contracts registry and Master agreements forms.
The form includes the following elements:
- data input area – designed to fill the parameters and conditions of the contract/report (Fig. 1,1);
- toolbar – used to perform tasks of saving, sending and checking of the filled message form (Fig. 1,2).
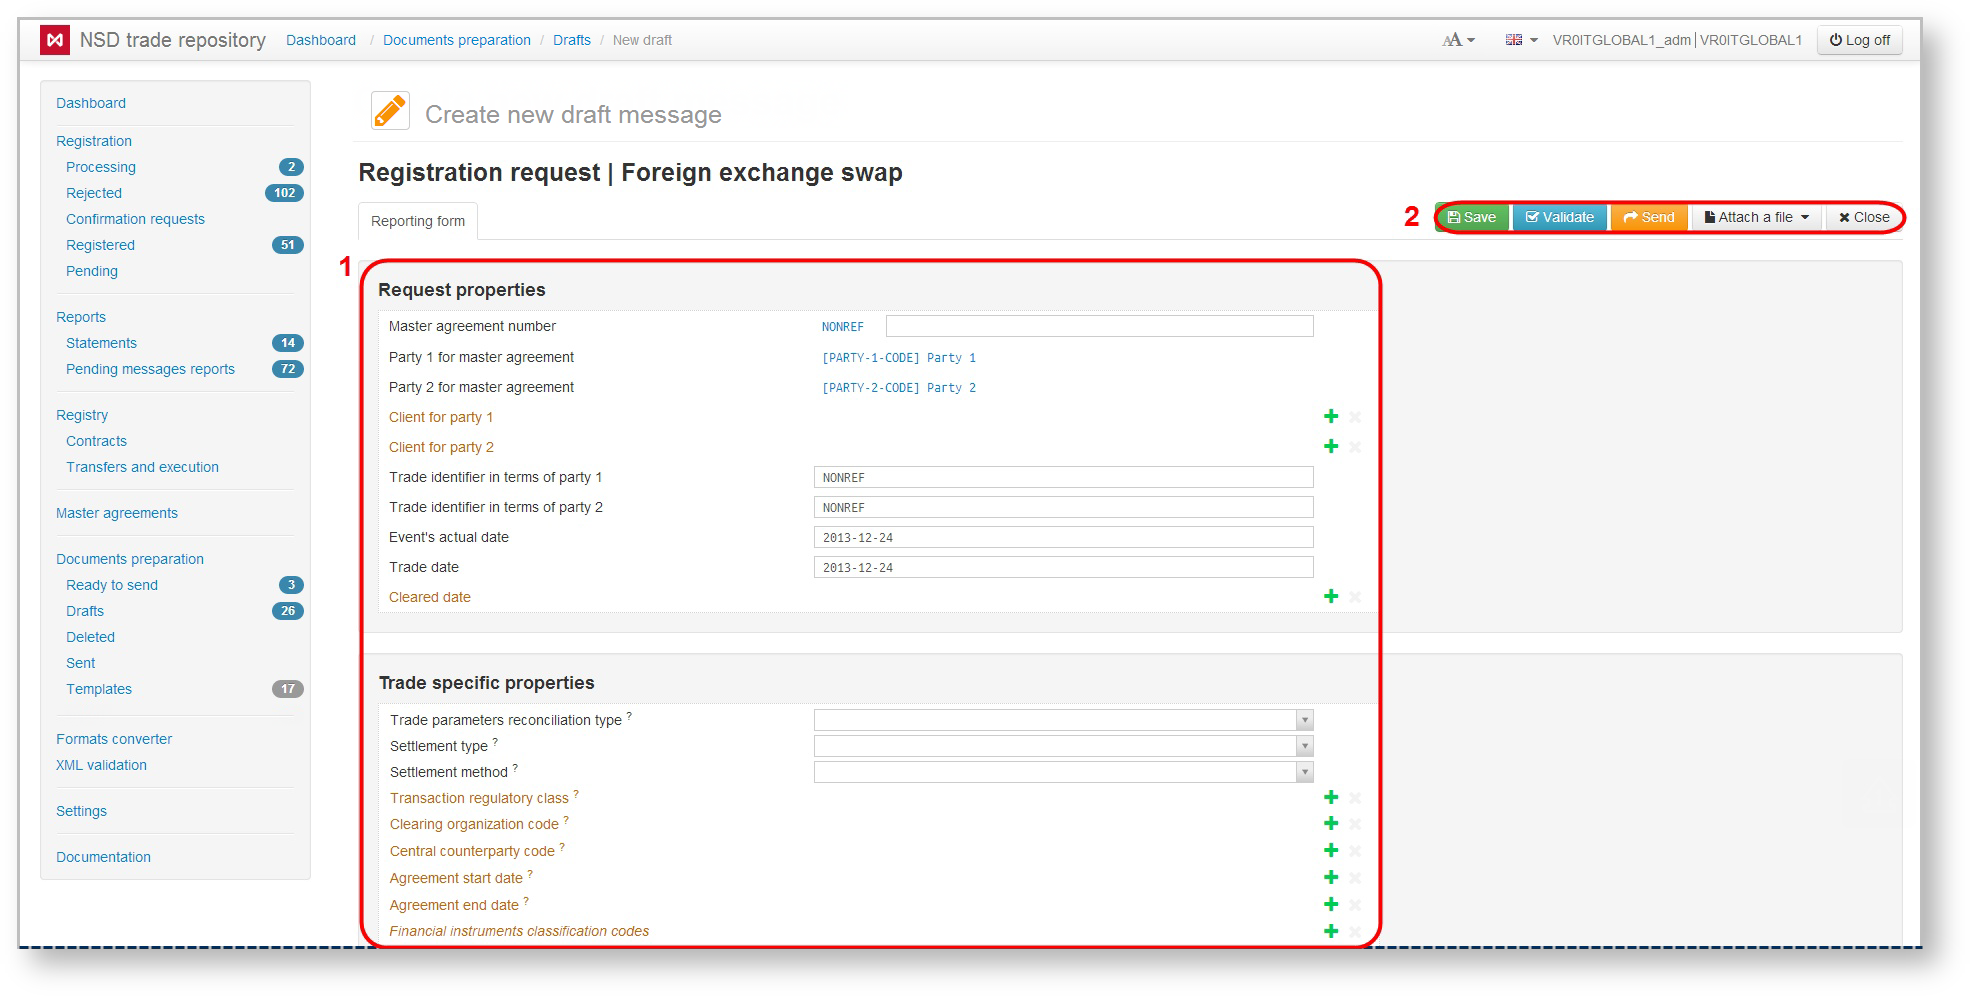
Fig. 3 – elements of the order creation form
Data input area
The data input area is divided into several blocks, the contents of which depend on the type of message (Fig. 2). Table 1 describes the blocks for contracts, MAs, reports and statement requests.
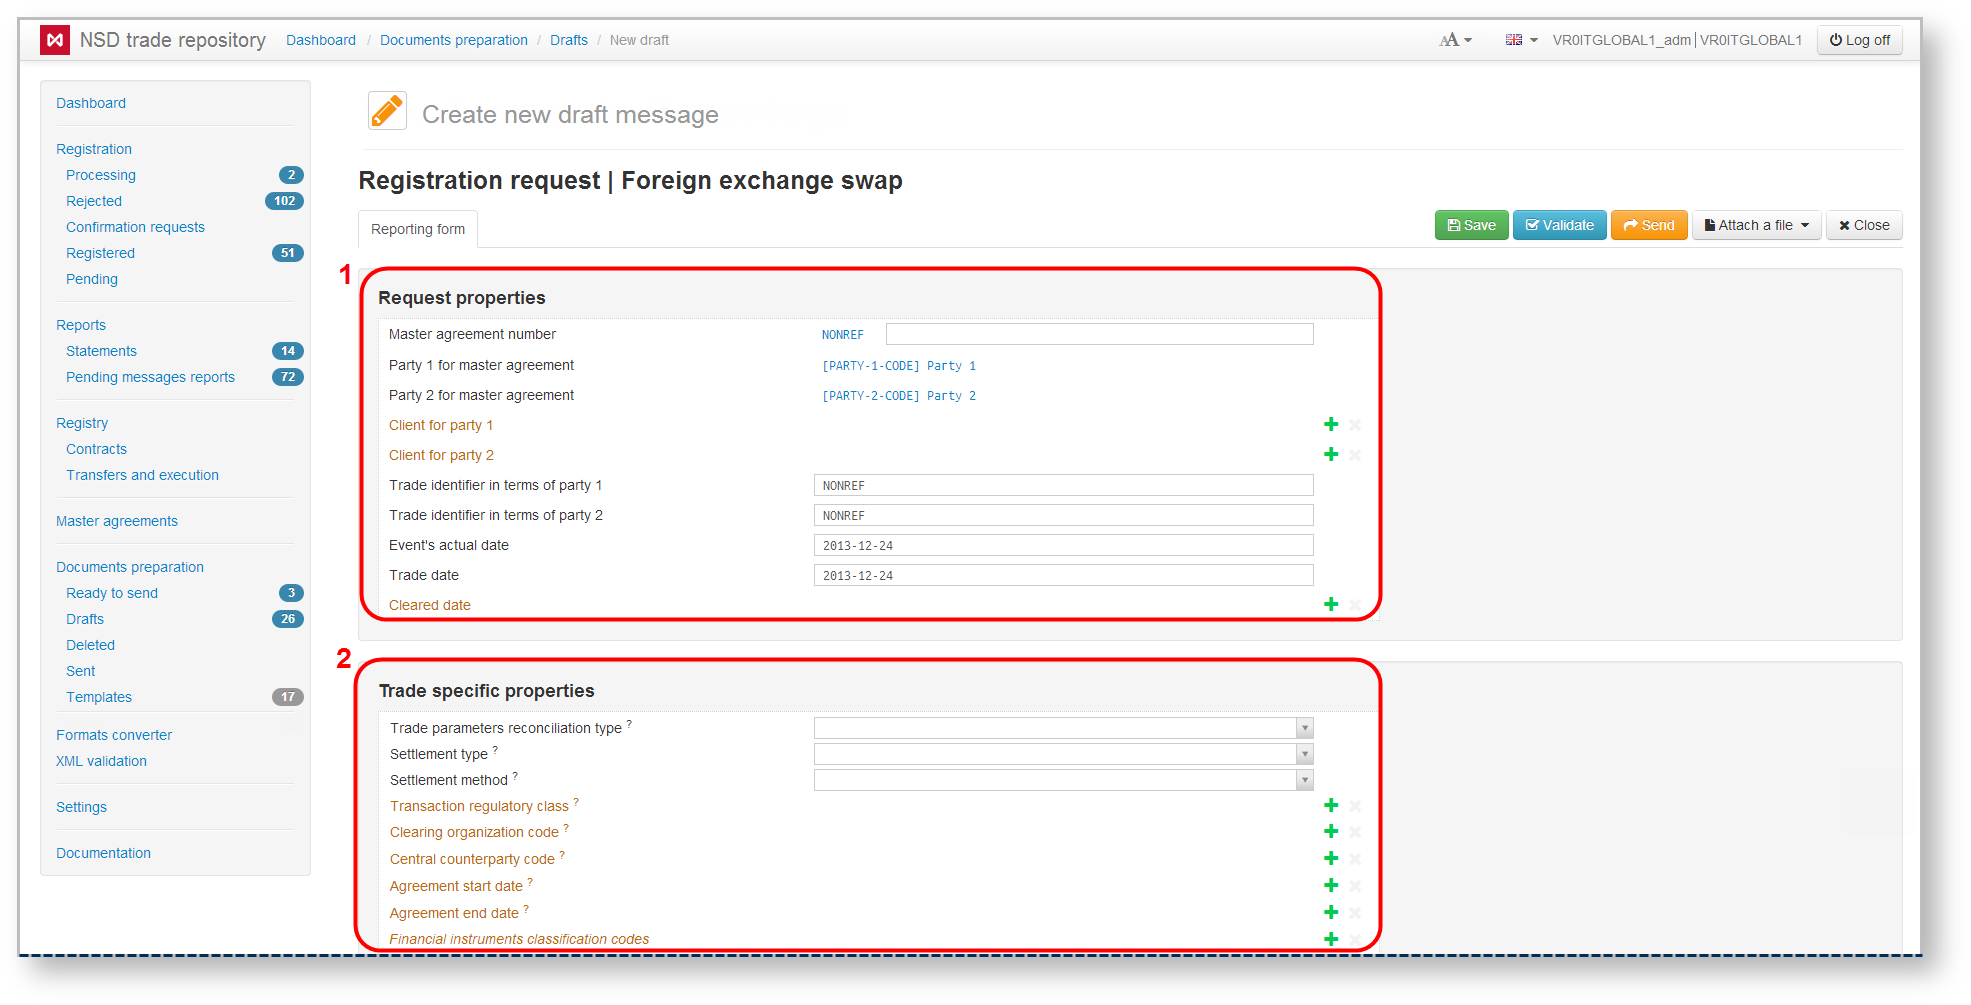
Fig. 4 – example of information blocks
Table 1 – Contents of blocks for various types of orders
| Block name | Required data |
|---|---|
| Contract registration | |
| Order parameters |
|
| Specific parameters of the transaction |
|
| Economic parameters of the transaction |
|
| Transaction security |
To fulfill the transaction security obligations check the Transaction security box This will open an additional area for data input |
| Master agreement registration | |
| Parameters of the master agreement |
|
| Terms of the Master Agreement |
|
| Quarterly report | |
| Order parameters |
|
| Report parameters |
|
| Report on the fulfillment of obligations | |
| Report parameters |
|
| Report on the status of obligation fulfillment | |
| Order parameters |
|
| Report parameters |
|
| Statement request | |
| Request parameters |
|
Description of the input fields
Input area contains required (Fig. 5,1) and optional (Fig. 5,2) data fields. Optional fields are disabled by default. To enable them, click  . As a result, the following interface changes will occur:
- the field will be possible to fill in;
- the button will be hidden;
- the disable field button will appear
 .
.
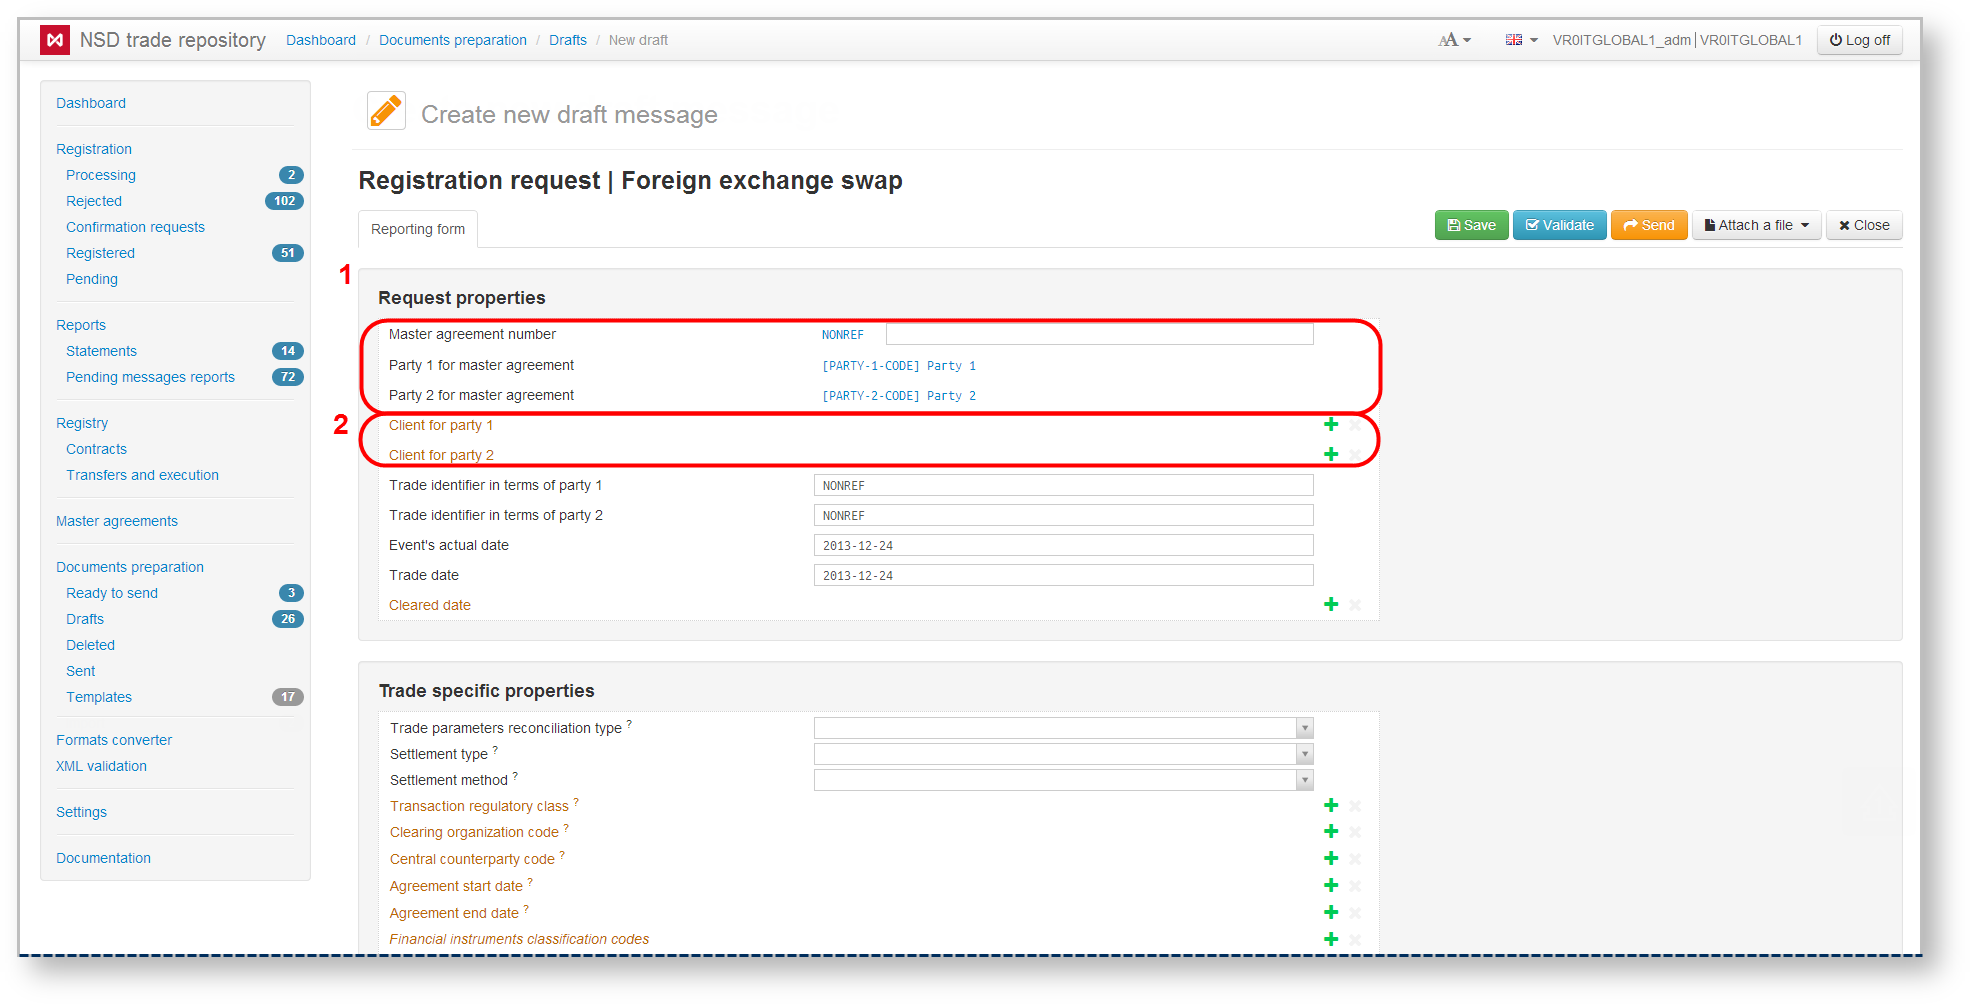
Fig. 5 – required and optional fields
Some fields can be duplicated by clicking on the button (Fig. 6). If there is a repeating field, the first click on the button enables it, and the next ones duplicate. To remove field duplicates click .
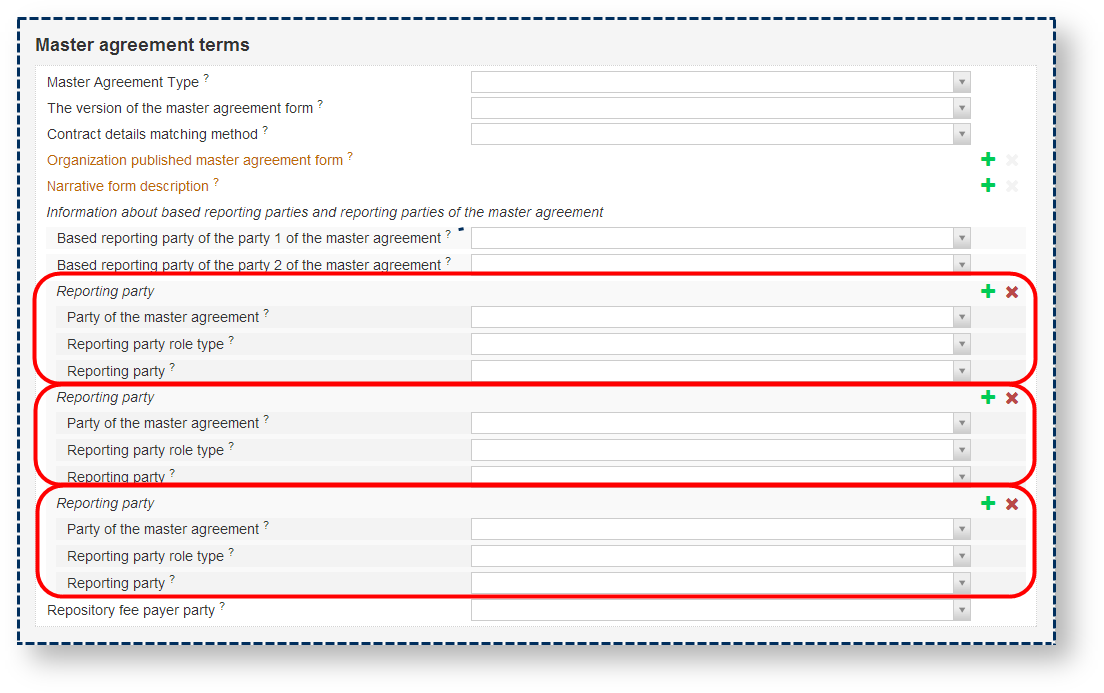
Fig. 6 – field duplication
When you hover the mouse over the “?” symbol (Fig. 7,1), a graphic element appears that contains the description of the corresponding field (Fig. 7,2). When you click on the icon  the website of the NSD’s trade repository messages specifications will open.
Fig. 7 – tooltips
Filling out data input fields
Depending on the field type, the following input methods are available:
- data selection in the pop-up window (MA number, MA party and dates of the transaction);
- manual data input (eg, contract number in the accounting system of the first/second party);
- selecting data from the drop-down list (for example, fields of the Specific transaction parameters group Specific transaction parameters group).
Master agreement identifier
Agreements can be concluded within the framework or without MA. Therefore, a Master agreement number field is an optional field. To activate the field, click the  button next to the field name.The Master agreement identifier field can be filled out by:
- manually typing the data into the row;
- selecting data in the pop-up window that opens by clicking on the
 button.
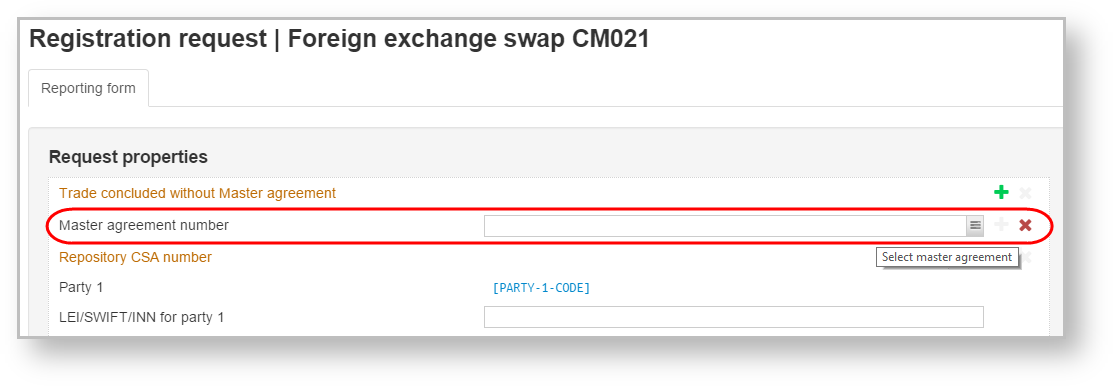
Fig. 8 – filling out the Master Agreement Number field
The manual data entry is used when creating a draft of initial registration message for a contract with a counterparty, who is not a client of the repository. In this case the master agrement can not be registered in the repository and thus it doesn't have a repository indentifier. For details on the registration of transactions with non-residents see section Registration of transactions with non-repository clients (russian version).
If MA is registered in the repository, you can select it from the list in the pup-up window (Fig. 9) that opens when you click on the NONREF link (see 8.2). In this window you need to:
- click on the button
 in the Counterparty field and select the MA category from the drop-down list (Fig. 9,1). If you select All available, you will be offered a list of all registered MAs. When selecting a particular counterparty, the system will generate a list of MAs, where that specific party is registered in any role;
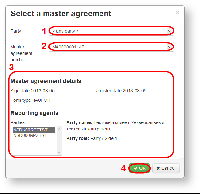
Fig. 9 – Selection of the master agreement - click on in the MA identifier field and choose the MA identifier from the drop-down list (see Fig. 9,2). As a result, the window displays information about the MA (see Fig. 9,3):
- date of MA conclusion and registration;
- MA form;
- list of counterparties and their roles.
- click OK to fill out the field in the main form (see Fig. 9,4).
As a result, the main form will indicate the identifier of master agreement (Fig. 10,1), fields Party 1 of the master agreement and Party 2 of the master agreement will be filled automatically (see Fig. 10,2).
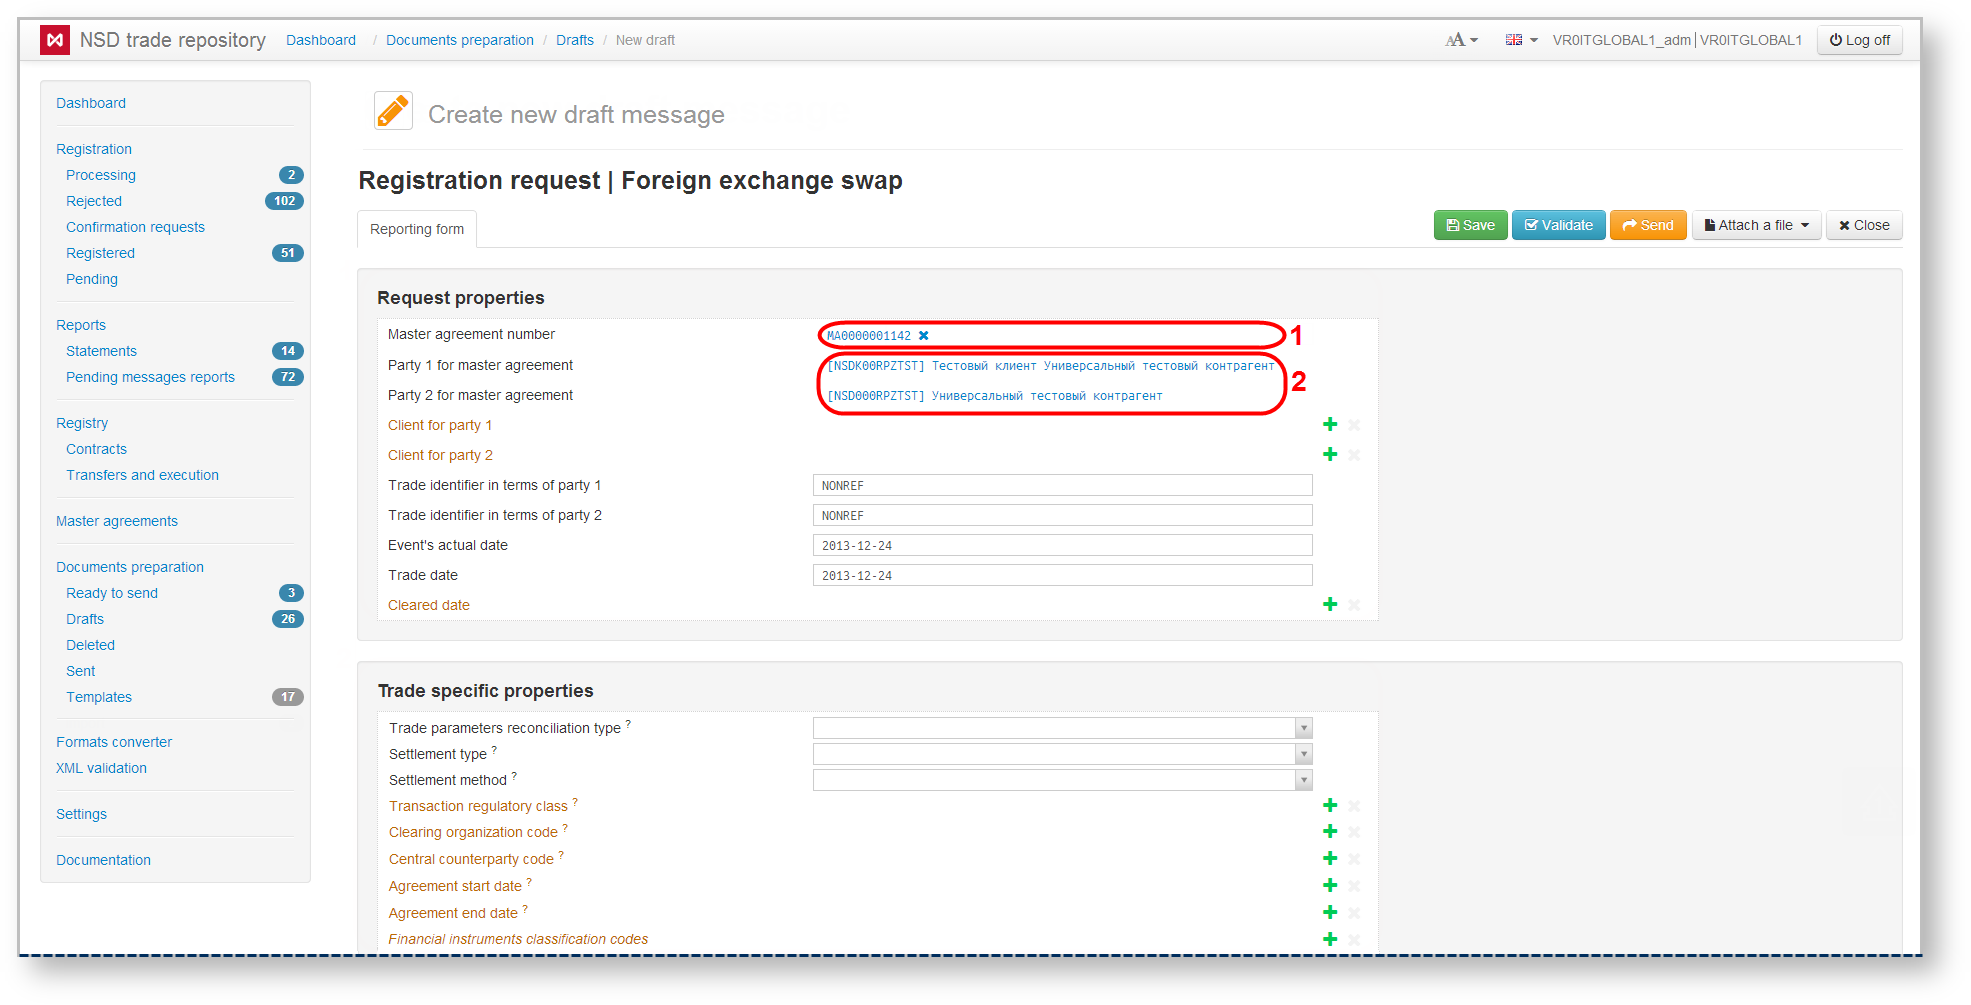
Fig. 10 – filling in form fields when selecting the MA number from the list
Clicking on the link next to the fields Party 1 of the master agreement or Party 2 of the master agreement will open the Counterparty window (Fig. 11) that will contain the following information:
- counterparty repository identifier;
- name of the organization;
- role of the counterparty.
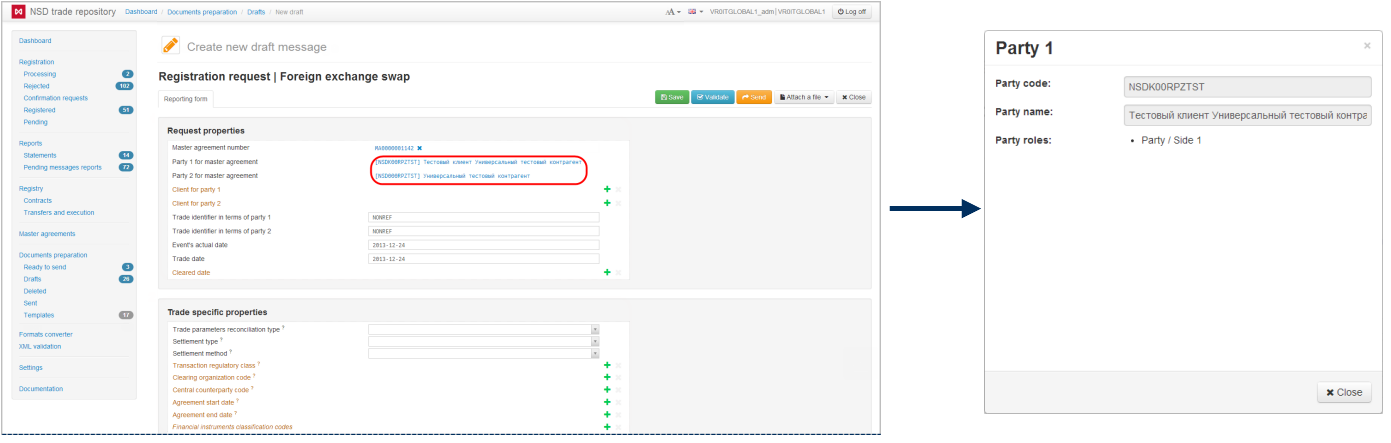
Fig. 11 – filling out the Party of the master agreement fields when choosing from the list of MA numbers
To change the MA identifier delete the current number with button and choose another one, following the instructions on filling out the Master agreement number field.
Trade concluded without MA
To conclude agreement without MA you need on the Message creation/editing form activate the Trade concluded without Master agreement field. You do not need to activate the Master agreement number field.
Fig. 12 – Trade without MA
Parties of the master agreement
If the MA identifier was entered manually (see Fig. 8,1), fields Party 1 of the master agreement and Party 2 of the master agreement will be filled in from the list of the Choose counterparties pop-up window (Fig. 14), which is opened by clicking on the link [PARTY-1-CODE] Party 1 (Fig. 13).
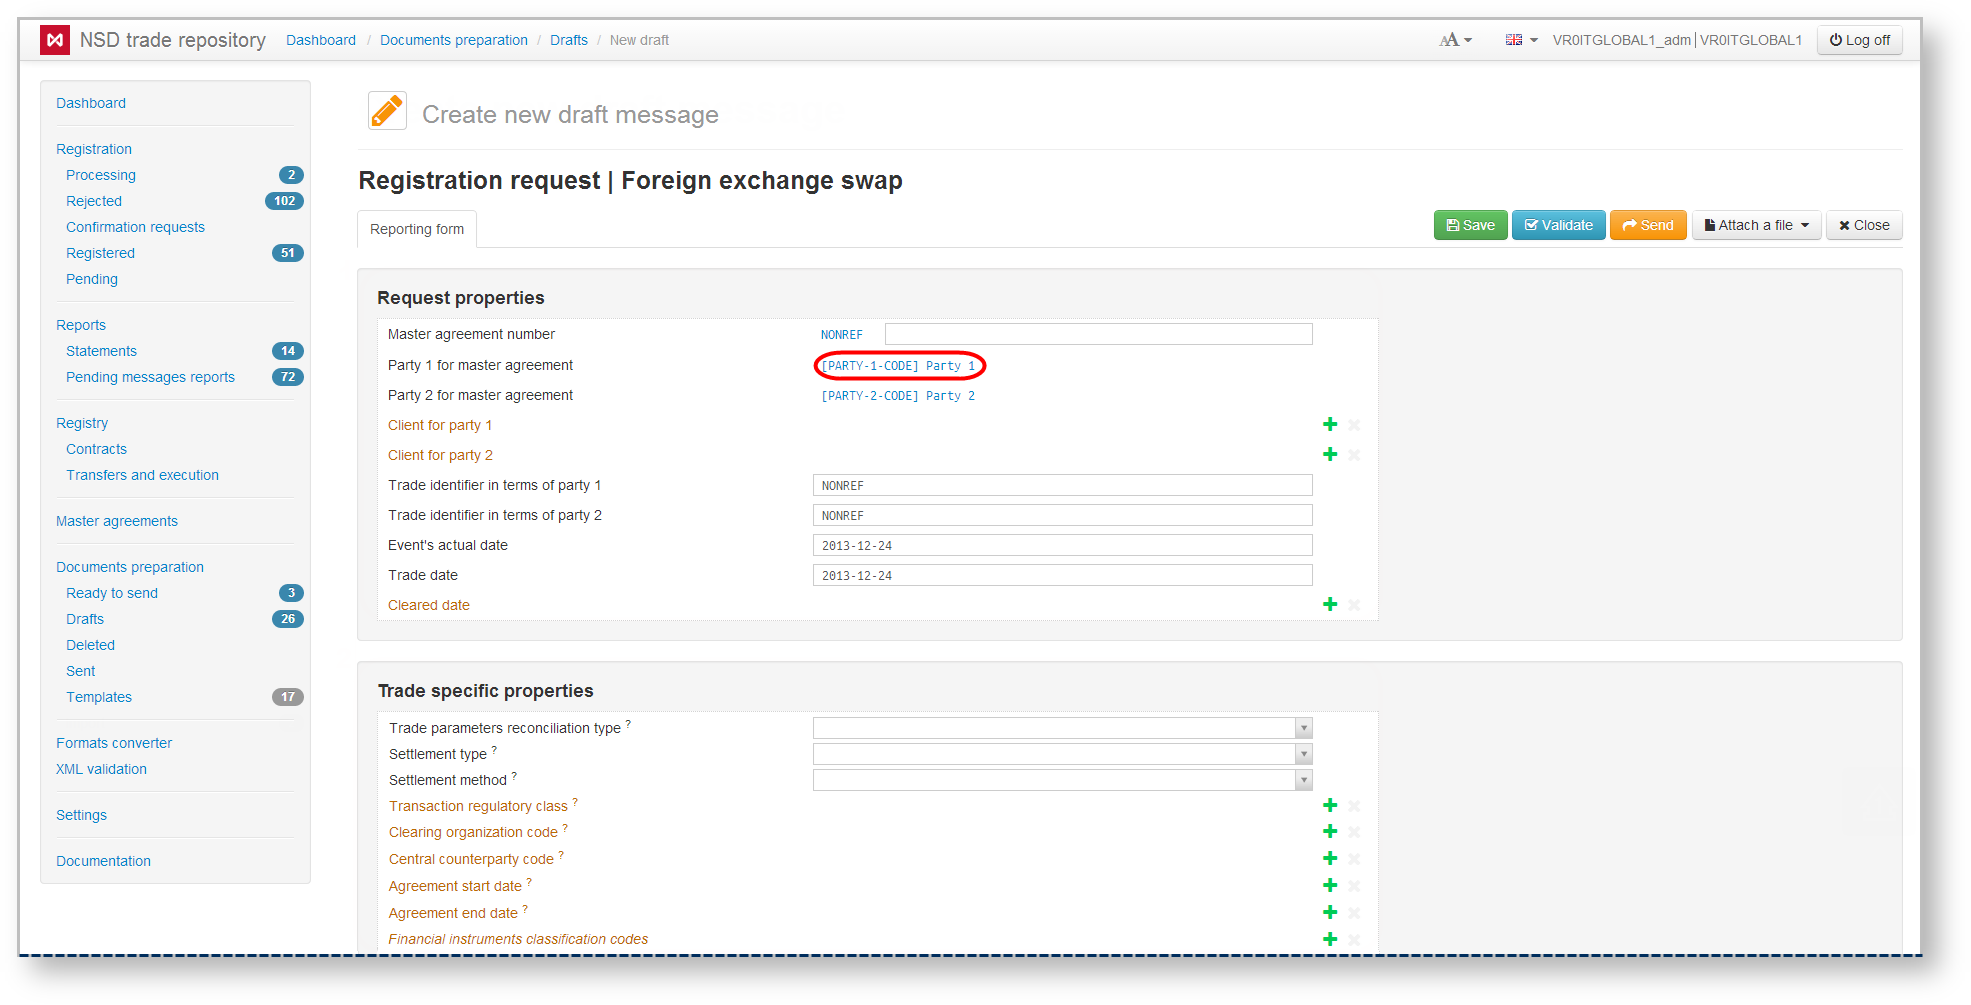
Fig. 13 – filling in the Party of the master agreement field
The Choose a party window contains a list of all organizations that are clients of the repository (Fig. 14,1).
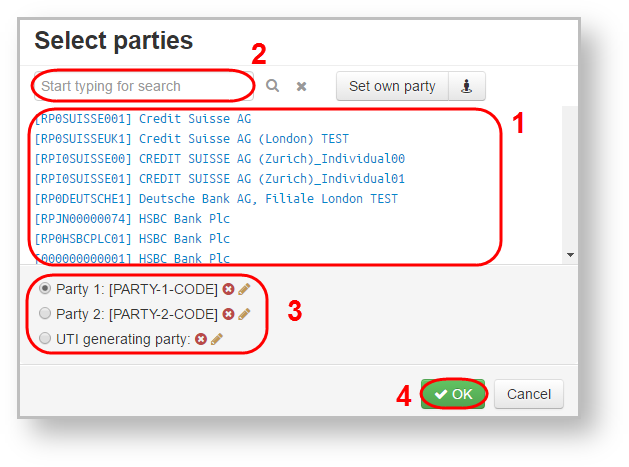
Fig. 14 – choose parties of the MA
To choose the necessary organization:
- select the company from the list or enter the company name in the search box (see Fig. 14,2). As a result, the customer list will display companies whose names fully or partially match the name typed in the search box.
- select the necessary company.
- click OK to fill in the main form field (see Fig. 14,4).
The second party of the MA, UTI generating party can be simultaneously selected in this window. To do this:
- check the chekbox (see Fig. 14,3).
- choose the necessary organization from the list.
- click OK to save the data.
To add the data of your party click the button.
Parties that do not report to the repository, are marked with icon.
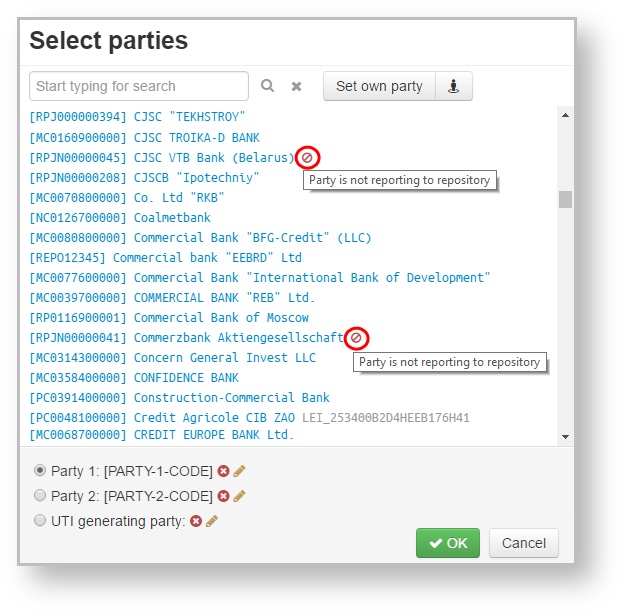
Fig. 15 – Not reporting parties
If you need to specify the organization, which is not in the list, click the Set own party button (Fig. 16,1). The [NONREF] will be added to the field. Next, enter the organization name (Fig. 16,2) and click OK.
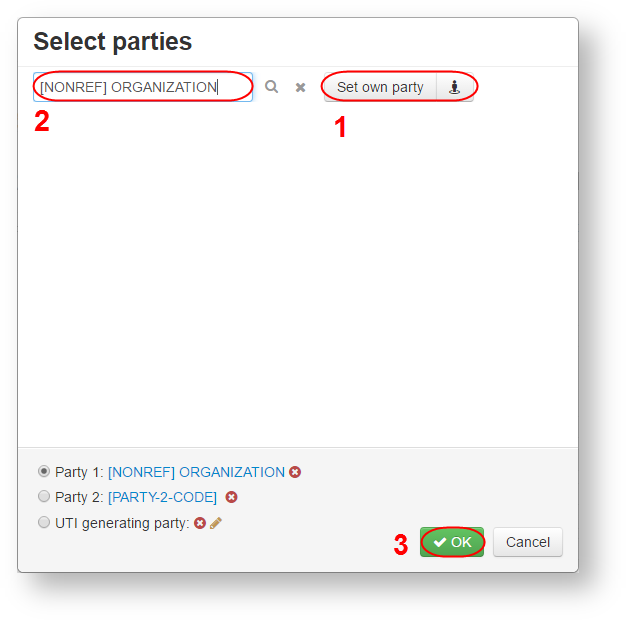
Fig. 16 – NONREF
For details on how to fill in the fields Party 1 of the master agreement or Party 2 of the master agreement in case of registering a transaction with non-clients of the repository, see section Registration of transactions with non-repository clients (russian version).
To change the MA party delete the current organization in this window with button ![]() and select another one, following the instructions on filling out the Party of the master agreement field.
and select another one, following the instructions on filling out the Party of the master agreement field.
Internal storage
Some of the fields are filled in with values from the system’s internal directories, for example, comparison modes, currency codes. To see the list of values click . This will open the list (Fig. 17), in which the values are displayed in alphabetical order. If you enter the value in the search box (see Fig. 18,1), the list will display values that partially or fully match the indicated one (Fig. 18,2). To fill in the fields, select the necessary value from the list. For a detailed description of the directories see the documentation NSD’s trade repository messages specifications.
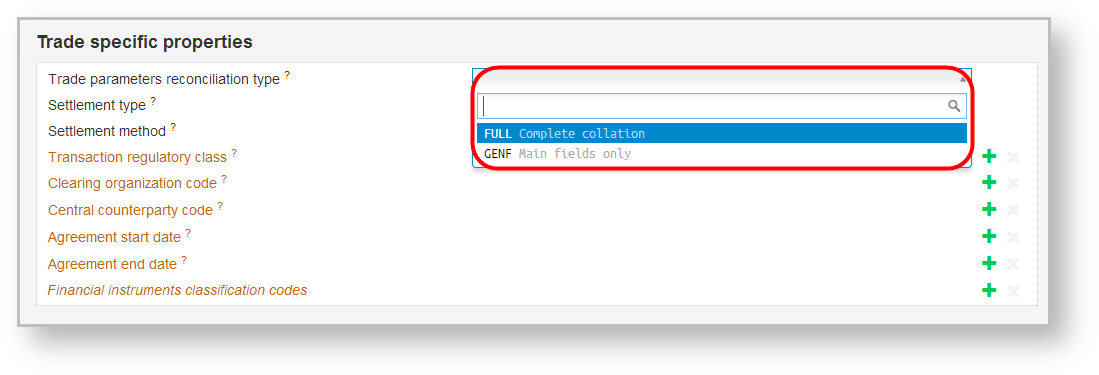
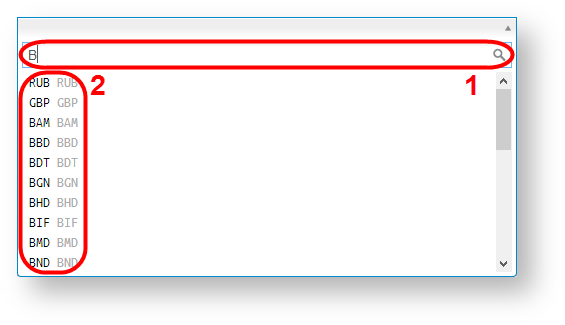
Fig. 17 – example of filling the fields using directories Fig. 18 – searching a value in the list
Draft name
To specify the draft name (also for modal window form), activate the name input field by clicking ![]() (Fig. 19), enter the order name into the field (Fig. 20) and click
(Fig. 19), enter the order name into the field (Fig. 20) and click  button to save the changes. To discard changes, click
  .
.
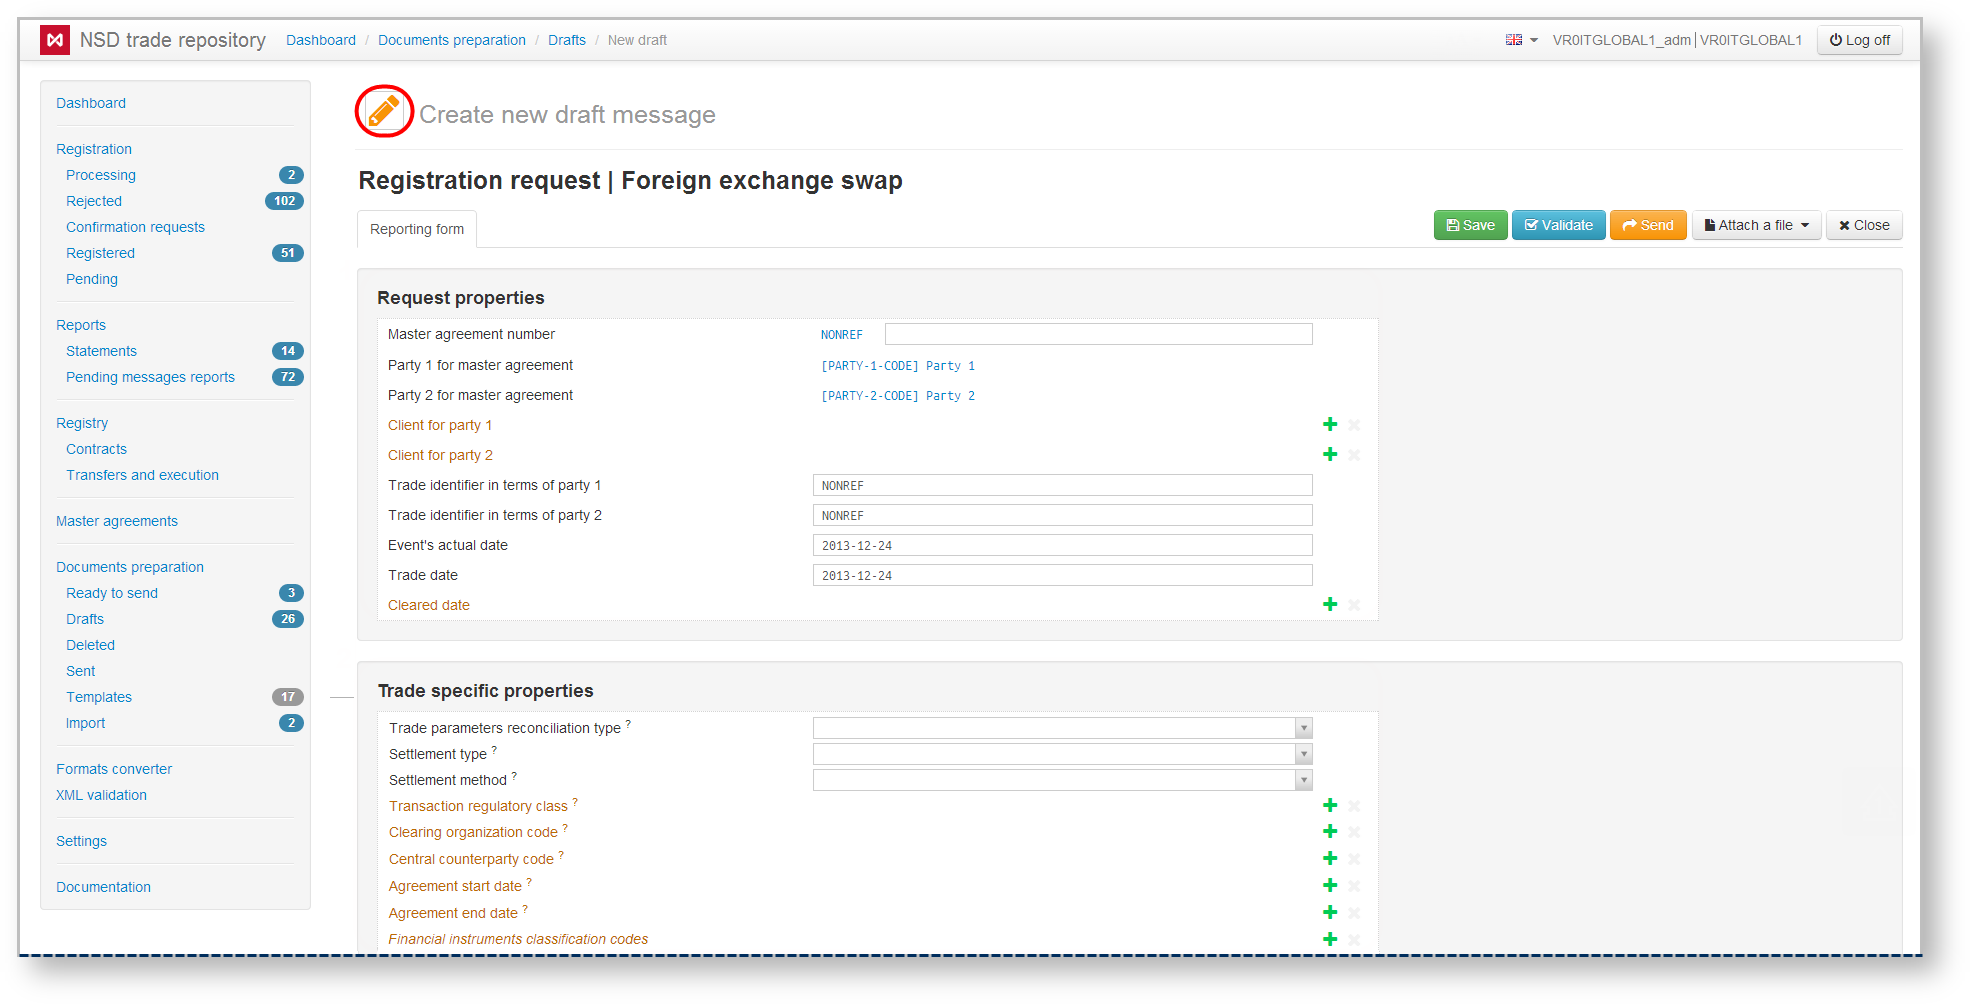
Fig. 19 – button enable the name input field
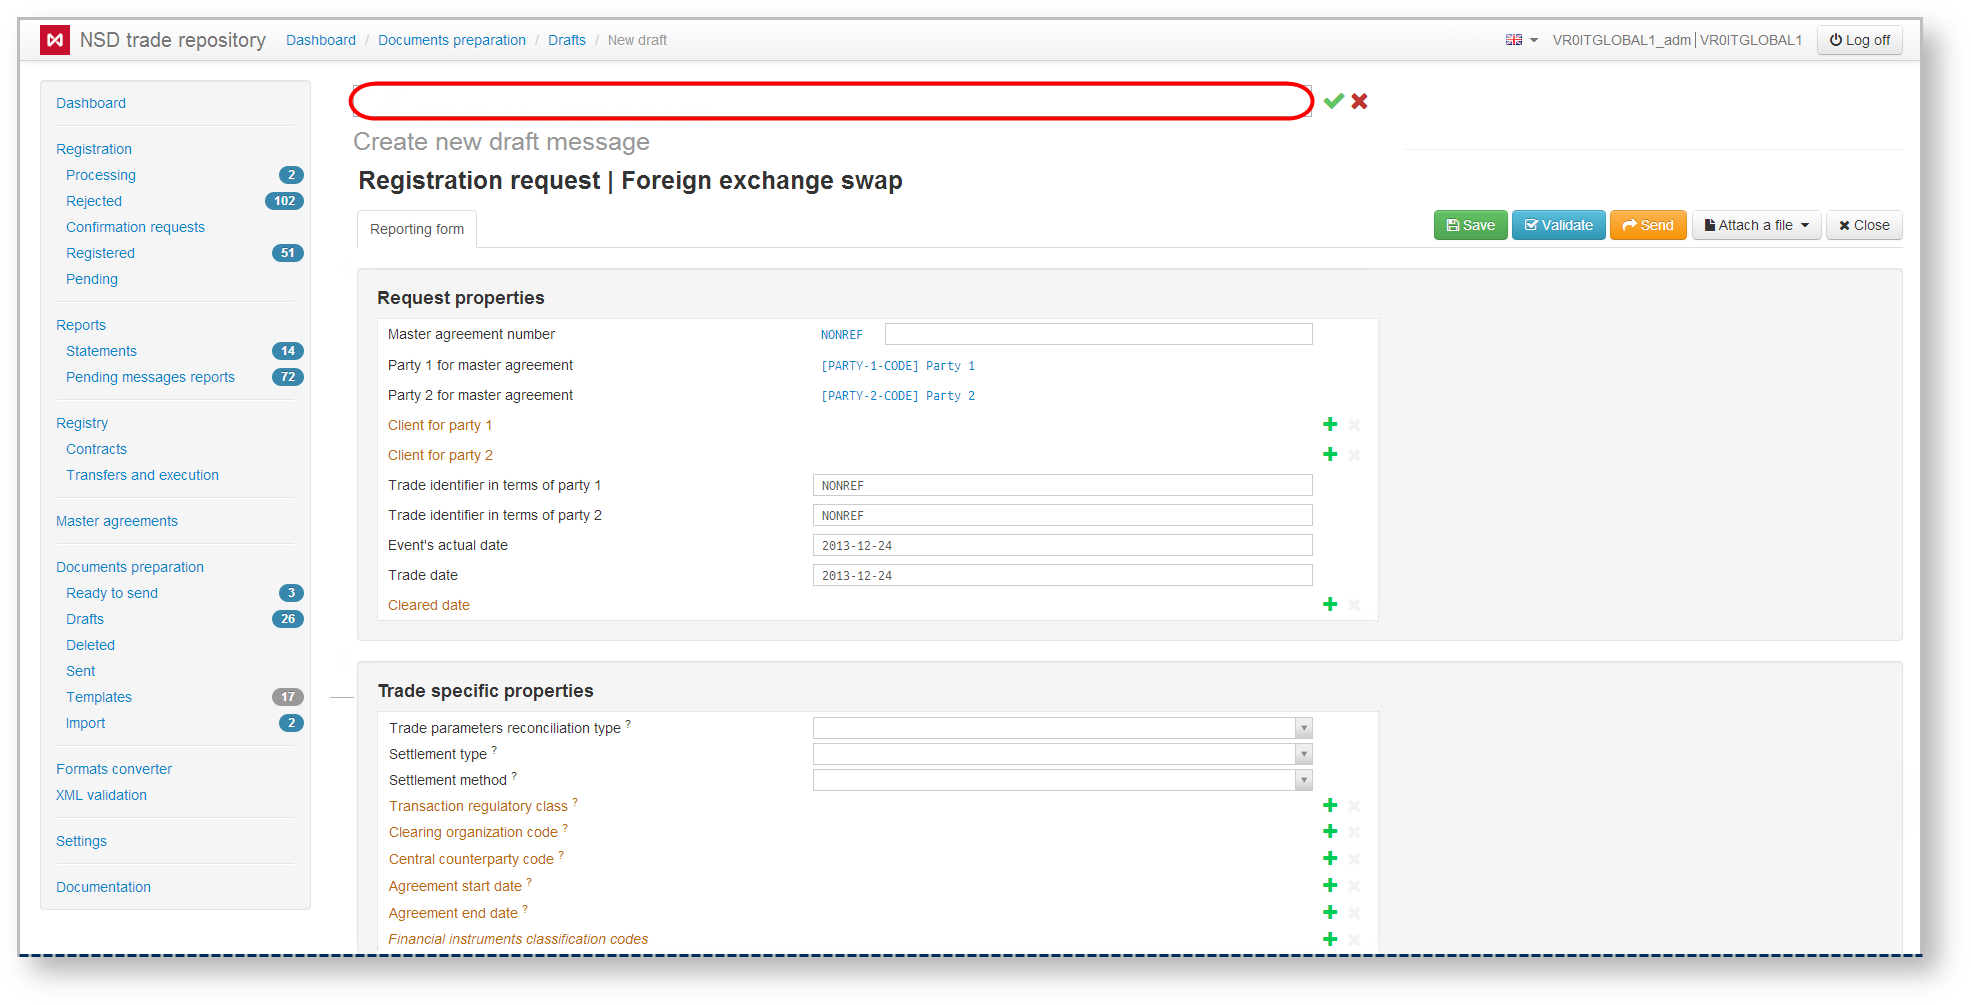
Fig. 20 – order name input field
The draft name will be displayed in the drafts list after saving.
Toolbar
The following actions can be applied to a draft:
- save;
- check for format compliance;
- send to the repository for registration;
- attach a file;
- close without saving changes.
These actions are performed using the toolbar buttons.
 – saving changes.
After clicking the button the order gets to the Drafts form. If at the creation of a new message the name was not specified, the Save window will open, where you must enter the draft name and confirm saving by clicking on the Save button.

Fig. 21 – saving changes
 – checking for format compliance.
After clicking the button, the system will automatically check the order for compliance with NSD formats. Check results will be displayed in the Log tab in the form of a list of system errors. (Fig. 22 and 23 – modal window).
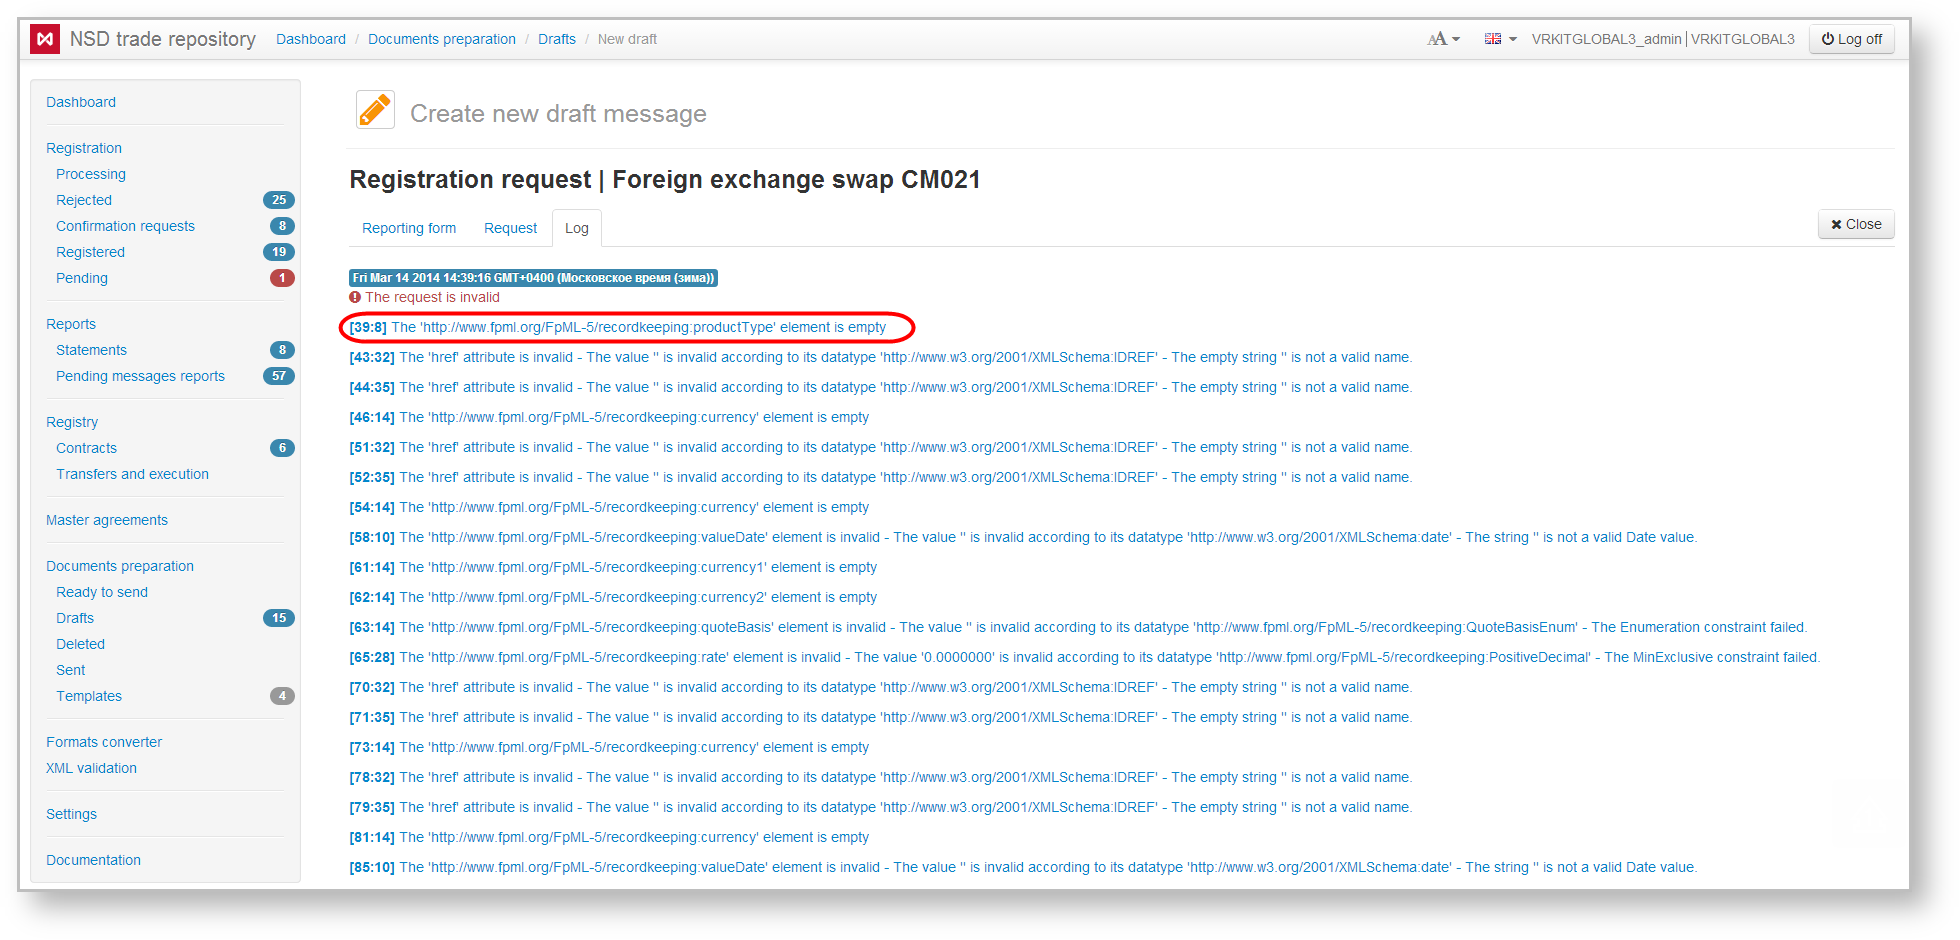
Fig. 22 – Log tab
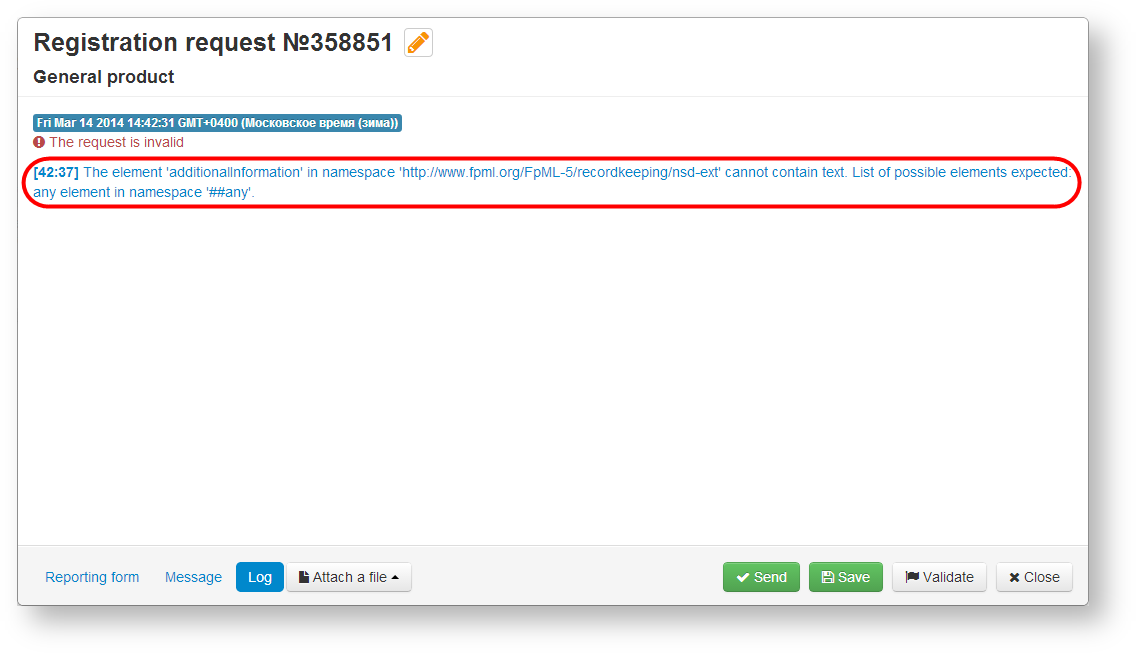
Fig. 23 – modal window
Click on the error takes the user to the Reporting form. The incorrectly filled fields will be highlighted in red. The specific error, on which you have clicked, will be highlighted in yellow (Fig. 24).
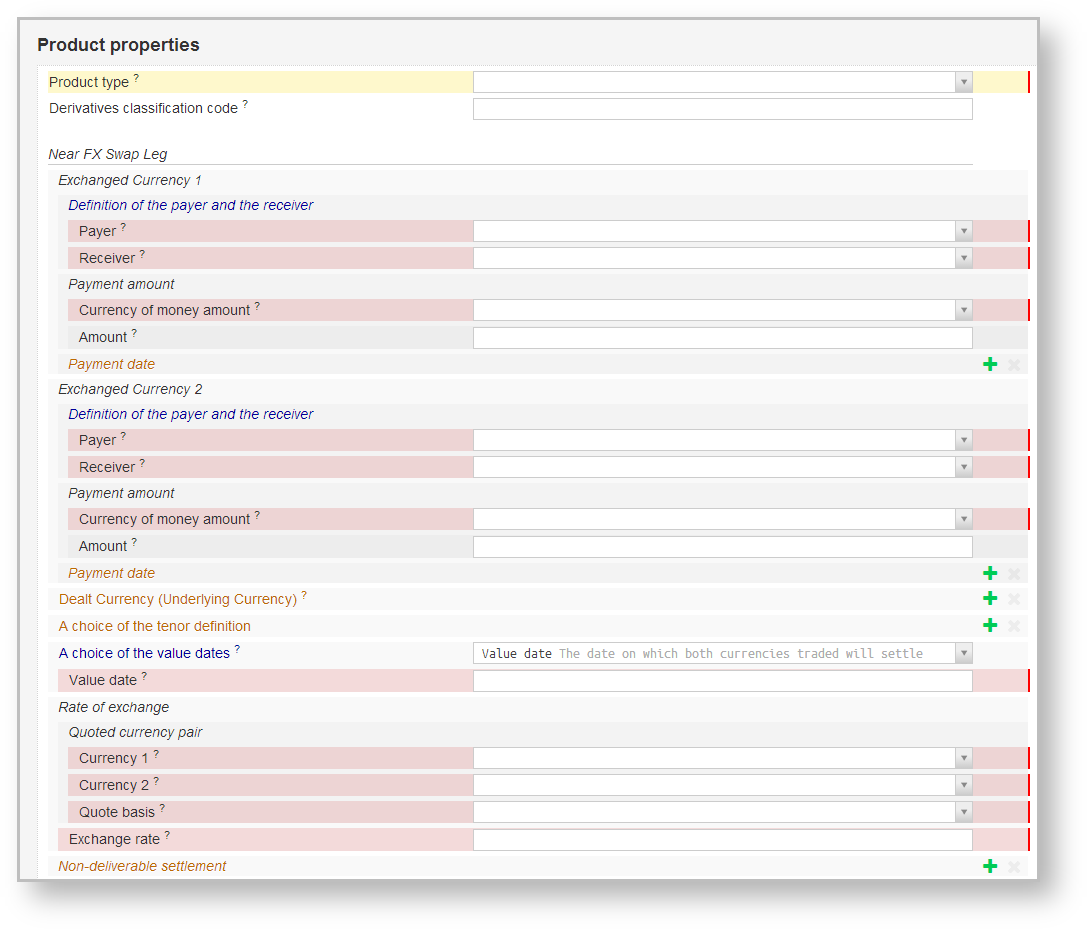
Fig. 24 – Reporting form
If the check does not detect any errors, the Log tab will indicate that the order is valid. The validation is also performed automatically when clicking Send. An invalid order cannot be sent to the repository.
 – sending order to the repository for registration (not available when creating, editing a template, order based on the template).
After clicking on the button a confirmation screen appears, where you need to click OK to place a DS (digital signature) and send the message to the repository (Fig. 25). The Send button is not available when creating, editing orders based on a template.
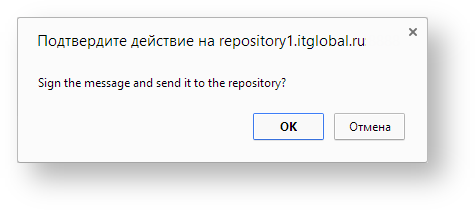
Fig. 25 – sending order
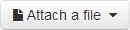 – adding a file to an order.
Clicking on the button opens a context menu with two file upload options:
- select file from the computer;
- select file from previous uploads.
After selecting one of the upload options opens the screen form with using which you need to select the necessary file and click  . When sending an uploaded document to the repository the file name will be changed automatically in accordance with the rules of NSD electronic document flow.
 – exit the order creation/editing form.
After clicking the button the confirmation window will appear, where you should click OK to exit form. You will be taken to the form which was opened to create or edit an order (Fig. 26).
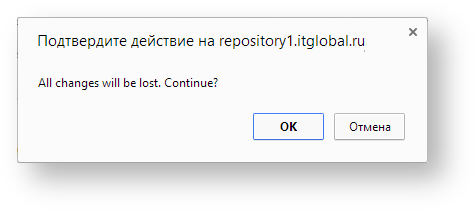
Fig. 26 – exit the order creation/editing form
Overview
Content Tools