The Import tab (Fig. 1) is intended for importing the FpML messages and FpML message archive, prepared by the third party systems into the Web-client.

Fig. 1 – Import form
To import a file:
- click
 . click button. This will open the Import draft form (Fig. 2);
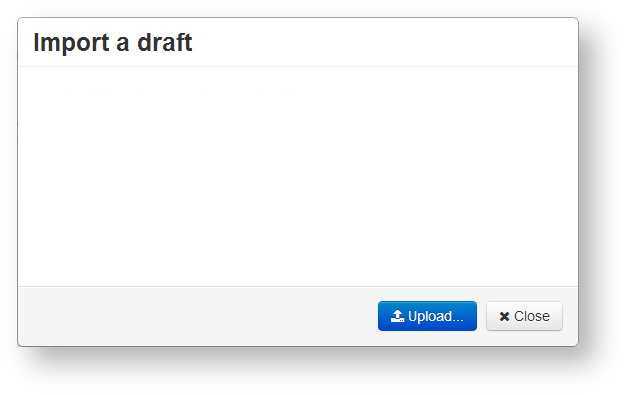
Fig. 2 – Import drafts form - click
 to go to choosing the required files. This opens the Opening window (Fig. 3);
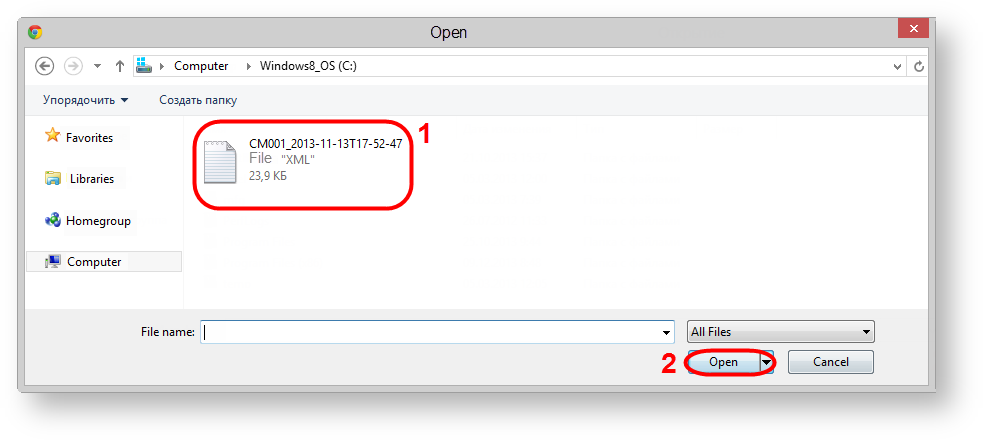
Fig. 3 – choosing file - select files or an archive (Fig. 3.1) and click the Open button (see Fig. 3.2). As a result, in the Import draft window will display the selected files (Fig. 4). If you select an archive, all fpml-files from the archive at any nesting level will be displayed in a hierarchical list. File format is checked during the upload. File that does not match the fpml format, will not be converted;
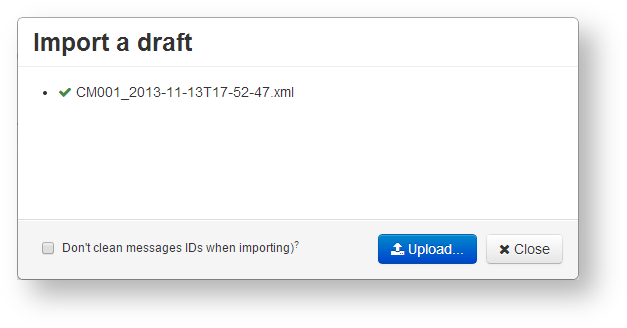
Fig. 4 – list of selected files - click
 click to exit the Import draft form.
Imported files are displayed as a table in the form (Fig. 5)
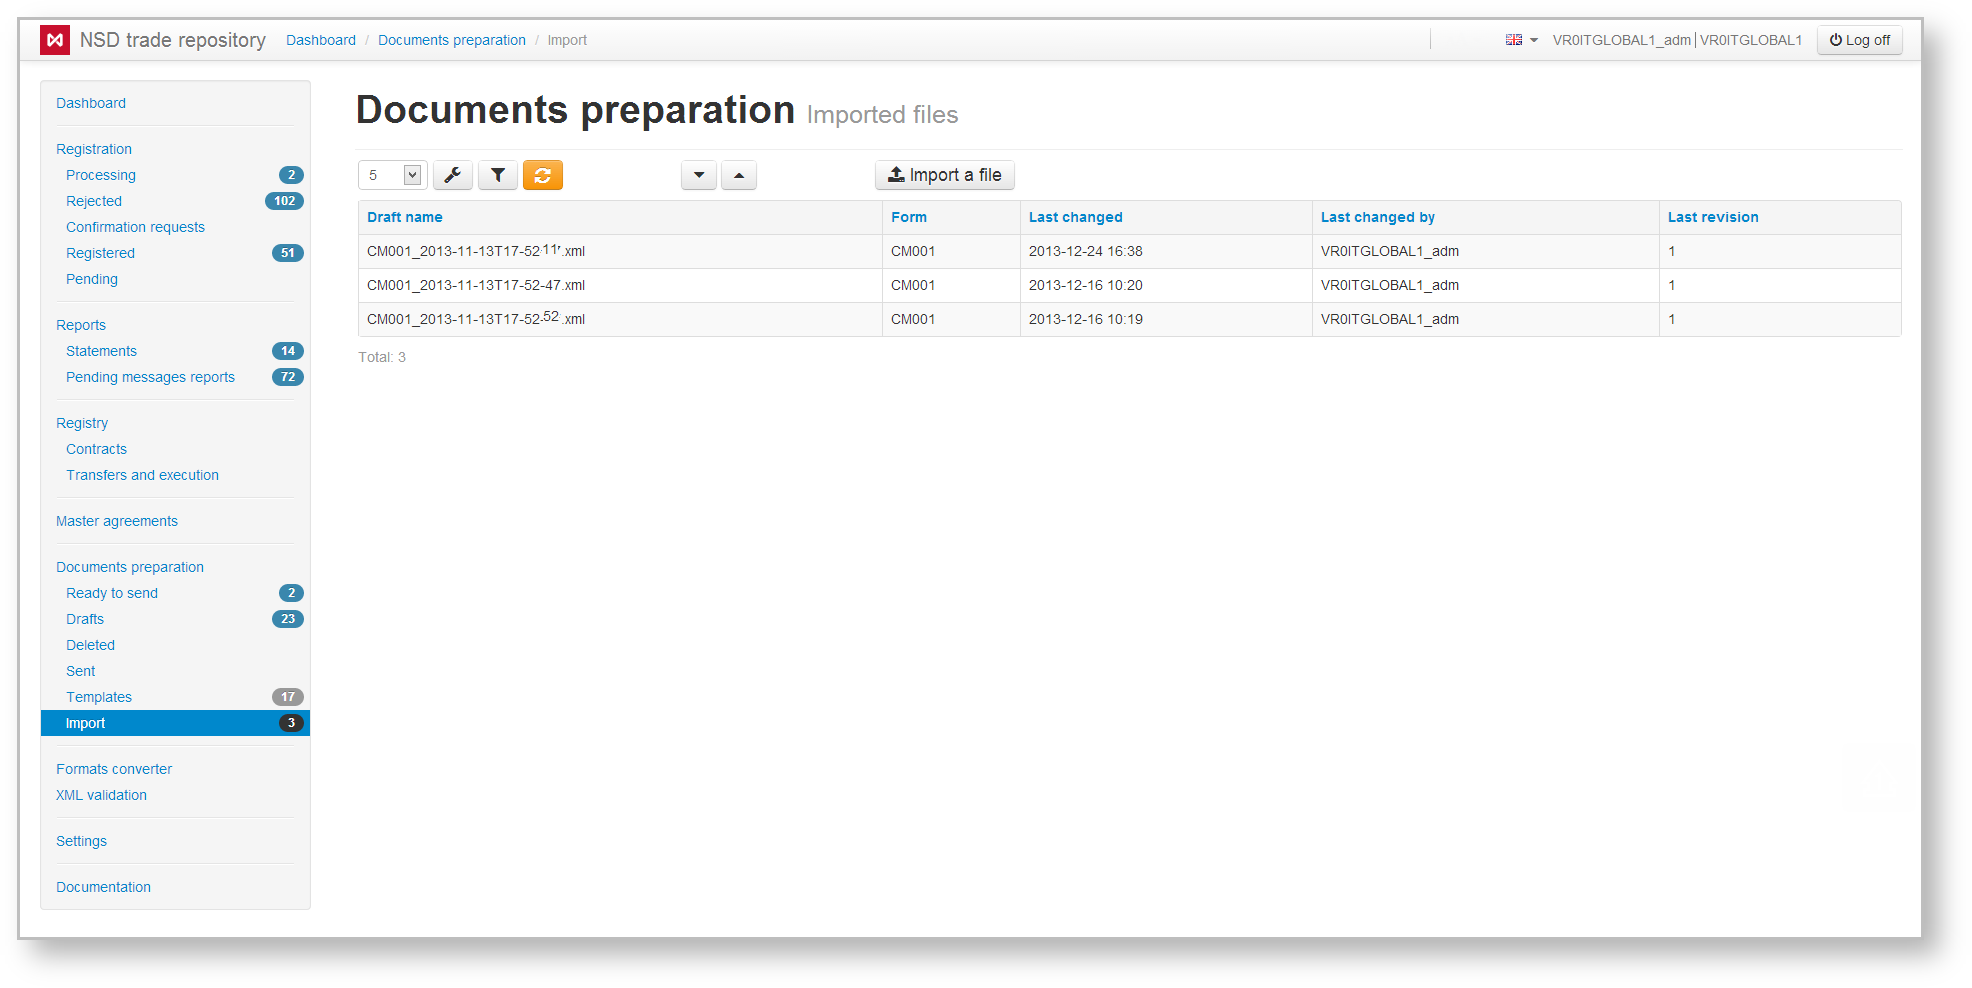
Fig. 5 – result file import
The table contains the following information:
- Draft name – message name, assigned when creating and saving;
- Form – code of the message form;
- Last changed – date and time of downloading message;
- Changed by – name of the user, who imported the file;
- Current revision – version of the document.
Hovering the mouse over the table row opens a toolbar, which is described in Table 1.
Table 1 – Description of the toolbar buttons
| Button | Description | Calling form |
|---|---|---|
 | Calling view form Clicking the button opens the preview form of the document, where you can view and print the data | 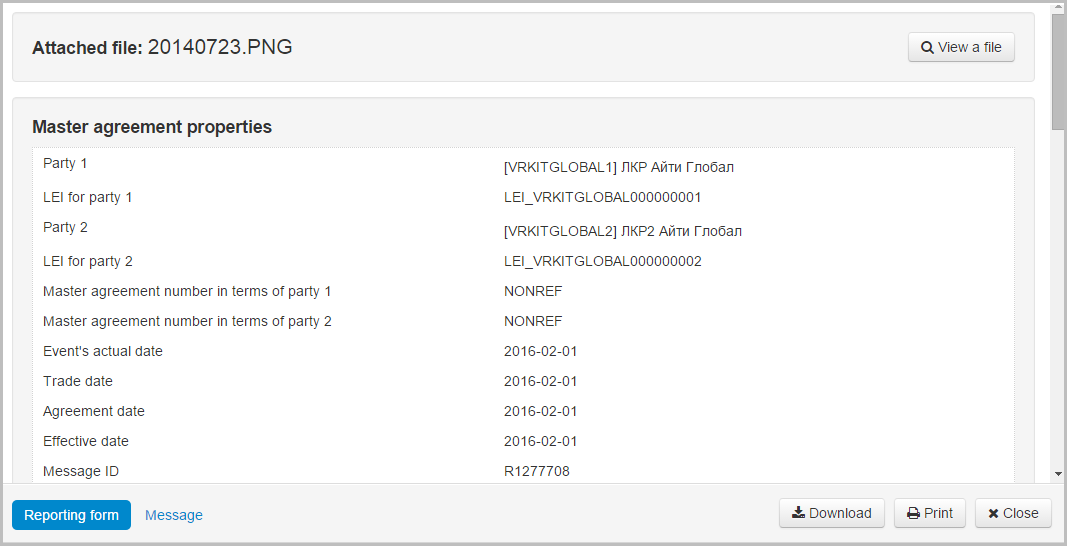 |
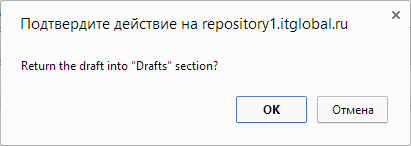
 | Saving a draft Clicking on the button opens a window to confirm the action, in which you must click OK to move the draft to the Drafts section |
|
 | Deleting a draft Clicking on the button opens a confirmation window, in which you need to click OK to delete. Deleted drafts are displayed in the Deleted form | 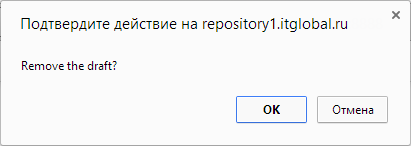 |
These tables are subject to information display settings, described in section General Settings.
Overview
Content Tools