This is the documentation for the console version of File Gateway. The old version is no longer supported.
Documentation for the new version of File Gateway is located here![]() .
.
To ensure correct operation of the file gateway the computer must have all the necessary cryptographic software installed (see Technical requirements).
Additionally, when using the GOST certificate you need to add the certificates to the system repository. To do this:
- open Сertificate storage;
- click the Service button on the top bar;
- choose Export certificates to the System repository in the menu that opens.
Installing via Console
To install FG:
- Copy the files from the Redist folder to the destination folder, eg. C:\FileGatewaySvc\.
On the page:
Сonfigure the service by the editing the svc.config file.To navigate to the file svc.config you need to paste %LOCALAPPDATA% into the Windows Explorer and press Enter. The parametrs are described in the File gateway settings section.
Specify in the svc.config file the path to the folder with logs (e.g. C:\FileGatewaySvc\Logs):
<fileGateway>
...
<logging logDirectory="C:\FileGatewaySvc\Logs\" ... />
...
</fileGateway>
Specify in the svc.config file the path to the database file (e.g. C:\FileGatewaySvc\Data\Database.db3):
<fileGateway>
...
<database dbPath="C:\FileGatewaySvc\Data\Database.db3" ... />
...
</fileGateway>
Prepare the credentials of the user on whose behalf the service will run (eg. VC_USER/SVC_USER_PASSWORD). The user must have administrator rights to work correctly with the cryptography. Also the certificates must be configured.
Allow access to the HTTP protocol. Run the command line as an administrator:
netsh http add urlacl url=http://+:8080/ user=SVC_USER
To change the port:
<fileGateway>
...
<webInterface listenUrl="http://localhost:8080" ... />
...
</fileGateway>
Skip this step if you do not want to use the web service interface.
Install the service. Run the command line as an administrator:
filegatewaysvc install -username:SVC_USER -password:SVC_USER_PASSWORD -
-autostart
Provide access to the folders:
destination folder (напр. C:\FileGatewaySvc\).
log folder (напр. C:\FileGatewaySvc\Logs\).
the folder with database (напр. C:\FileGatewaySvc\Data\).
Configure the proxy server (see Proxy server configuration).
Run File Gateway (see Running File Gateway).
The Hardware id will be installed. This app is used to generate hardware code of the computer on the basis of which a licence is granted to use File gateway (see Licensing).
When you first start the service, it is recommended to run the service via console.
Installing via the Setup Wizard window
Setting up file gateway starts with running the NSD.FileGateway.Setup file. This will open the Setup Wizard window, in which you need to click Next (Fig. 1).
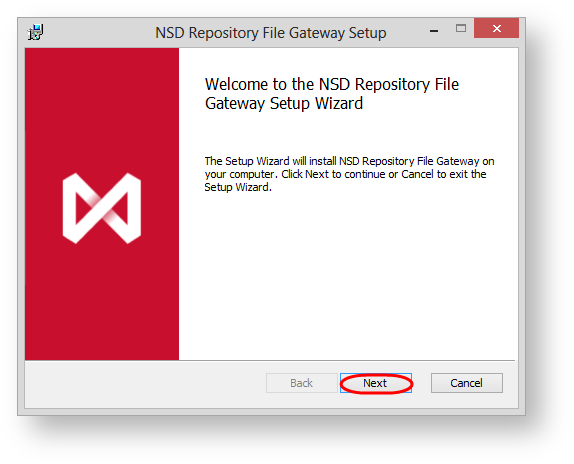
Figure 1 - welcome screen of the file gateway installation wizard
In the next window (Fig. 2.1) choose the service installation folder (by default, С:\Program Files(x86)\NSD.FileGateway\), using the Change button (Fig. 2.2), then click Next (Fig. 2.3) to move to the next configuration step.
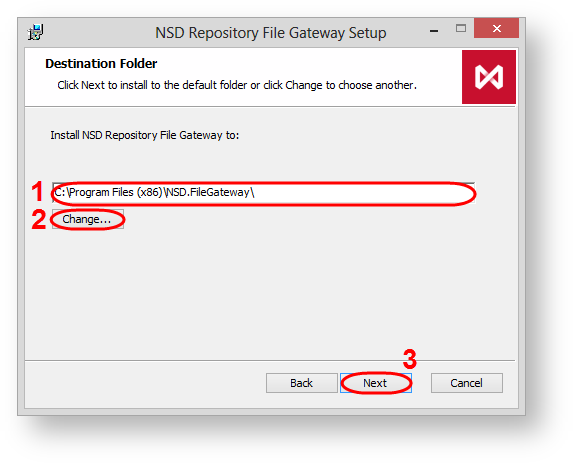
Figure 2 – folder for installing file gateway
A window will open (Fig. 3), where you should specify the the account password of the user, on behalf of which the File Gateway will be launched.
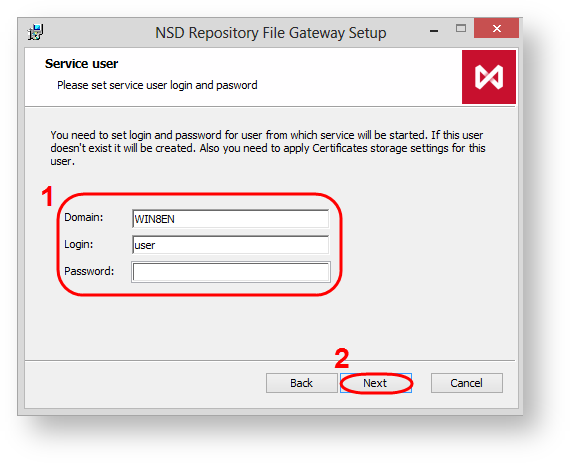
Figure 3 – user account settings
If the password does not belong to the account, an error message will be displayed (Fig. 4).
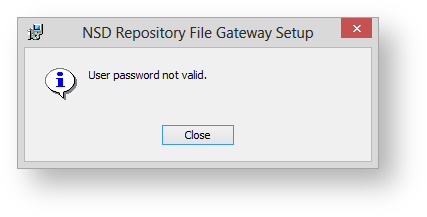
Figure 4 – filling parameters
The installation will continue after correctly filling the fields. If the login and password do not exist, the system will create a new account. Then click Install to install all services and components (Fig. 5).
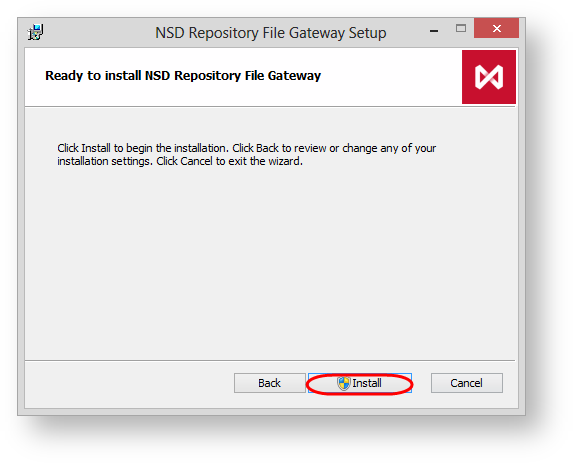
Figure 5 – run the installation of components
This will open a Windows security window (Fig. 6), in which you must click Yes.

Figure 6 – run the installation of components
The installation process takes a few minutes and will be displayed in the Status field (Fig. 7).
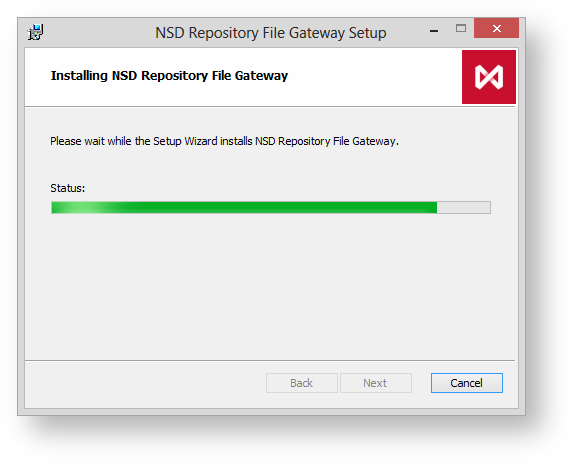
Figure 7 – installation progress
After completing the installation of file gateway an information window will be displayed (Figure 8), where you should click Finish to exit the installation wizard.
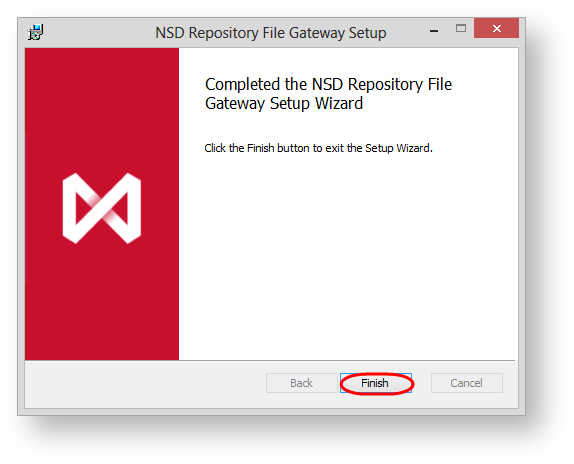
Figure 8 – completing installation
After installation, start the service and perform the initial system configuration.
For the File Gateway version 7.0.62 and higher the license is not required.
Overview
Content Tools